How Many Amps Does It Take to Charge a Tesla at Home
Charging a Tesla at home typically requires 24 to 48 amps using a dedicated 240-volt circuit, but the exact number depends on your Tesla model and charger type. A Tesla Wall Connector delivers the fastest home charging speeds, while a standard NEMA 14-50 outlet provides a solid backup. Understanding your amperage needs helps you choose the right charger and avoid electrical issues.
If you are thinking about buying a Tesla or you already own one, you have probably asked yourself a simple but important question: how many amps does it take to charge a Tesla at home? The answer is not as straightforward as you might think. It depends on your charger type, your Tesla model, and your home electrical setup.
Understanding amps is the key to making your Tesla charging experience smooth and efficient. Too few amps, and you will be waiting all night for a full charge. Too many, and you might trip your circuit breaker or overload your electrical panel. This guide breaks down everything you need to know about Tesla charging amperage in plain, simple terms.
Whether you have a Tesla Model 3, a Model Y, a Model S, or a Model X, the principles remain the same. We will walk you through every charging level, every outlet type, and every amperage option so you can make the best decision for your home and your wallet.
Key Takeaways
- Level 1 Charging: Uses 12 to 16 amps from a standard 120V outlet and adds about 3 to 5 miles of range per hour.
- Level 2 Charging: Requires 24 to 48 amps on a 240V circuit and is the most practical setup for home Tesla owners.
- Tesla Wall Connector: Supports up to 48 amps and delivers the fastest home charging speeds available.
- NEMA 14-50 Outlet: A popular middle-ground option that provides 32 amps of power and is relatively easy to install.
- Electrical Panel Capacity: Your home’s electrical panel must support the amperage your charger demands, or you may need an upgrade.
- Charging Time Varies: Depending on amperage, a full charge can take anywhere from a few hours to overnight.
📑 Table of Contents
- Understanding Amps and How They Relate to Tesla Charging
- Tesla Charging Levels Explained
- How Many Amps Does Each Charging Option Draw
- What You Need for Home Tesla Charging
- Common Mistakes People Make When Setting Up Tesla Charging
- Expert Tips to Optimize Your Tesla Charging at Home
- How Many Amps Does It Take to Charge a Tesla: The Final Answer
Understanding Amps and How They Relate to Tesla Charging
Before we dive into specific numbers, let us talk about what amps actually mean in the context of charging your car. Amperage, or amps for short, measures the flow of electrical current. Think of it like water flowing through a hose. The higher the amperage, the more electrical “water” flows to your car, and the faster it charges.
Voltage is the pressure that pushes that water, and wattage is the total power result. In simple terms:
- Amps = the volume of electrical flow
- Volts = the pressure behind the flow
- Watts = the total power produced (Amps x Volts)
For Tesla charging, both amps and volts matter. Most home charging setups in the United States use either 120 volts or 240 volts. A 120-volt outlet is the standard outlet you find in every room of your house. A 240-volt outlet is the same type used by large appliances like dryers and ovens.
The amperage your charger draws directly affects your charging speed. A higher amp setup means more power reaches your battery in less time. This is why knowing your amperage needs is so important before you install a home charger.
Why Amps Matter for EV Charging
When you plug in your Tesla, the car and the charger negotiate how much power to draw. This negotiation depends on the capabilities of both the charger and your car’s onboard charger. Tesla onboard chargers have a maximum amperage they can accept, and your charger cannot exceed that limit.
For example, most Tesla models have an onboard charger that accepts up to 48 amps. If you install a charger that can deliver 48 amps, your Tesla will charge at its maximum home charging speed. But if you use a charger that only delivers 32 amps, your car will charge slower because it is limited by the charger, not the car.
Understanding this relationship helps you avoid wasting money on equipment that does not match your needs. It also prevents electrical problems that can arise from mismatched setups.
Tesla Charging Levels Explained
Tesla charging comes in three main levels. Each level uses a different amount of amperage and delivers different charging speeds. Let us break them down one by one.
Level 1 Charging: The Standard Outlet
Level 1 charging uses a standard 120-volt household outlet. This is the simplest option because you do not need any special equipment. You just plug your Tesla into a regular wall outlet using the mobile connector that comes with the car.
Level 1 charging typically draws between 12 and 16 amps. It adds approximately 3 to 5 miles of range per hour of charging. That means if you drive 40 miles in a day, you would need to charge for 8 to 13 hours to replenish that range fully.
Level 1 charging works well if you only drive short distances each day. But for most Tesla owners, it is too slow for everyday use. If you have a long commute or frequently take road trips, Level 1 will leave you frustrated.
Level 2 Charging: The Home Sweet Home Setup
Level 2 charging is the most popular choice for Tesla owners who want a reliable home charging setup. It uses a 240-volt circuit, the same type of outlet your clothes dryer or oven uses.
Level 2 charging typically draws between 24 and 48 amps, depending on your charger and electrical panel. It adds approximately 20 to 44 miles of range per hour. This means you can fully charge most Teslas overnight, usually within 6 to 10 hours.
Level 2 charging requires a dedicated circuit and a proper charger. You have two main options:
- Tesla Wall Connector – Tesla’s official home charger that supports up to 48 amps
- Third-party Level 2 chargers – Various brands that offer similar performance at lower prices
Both options deliver significantly faster charging than Level 1. The Tesla Wall Connector is the most seamless choice because it integrates directly with your car’s software and provides the best charging experience.
Level 3 Charging: Superchargers and DC Fast Charging
Level 3 charging uses direct current (DC) and delivers extremely high power. Tesla Superchargers can deliver up to 250 kilowatts or more. However, Level 3 charging is not practical for home use because it requires specialized infrastructure and massive electrical connections.
For home charging, Level 2 is the sweet spot. It offers the best balance of speed, cost, and ease of installation. Level 3 is reserved for road trips and quick pit stops.
How Many Amps Does Each Charging Option Draw
Now let us get into the specific numbers. Here is a breakdown of the amperage for each common Tesla home charging option.
| Charging Option | Voltage | Amps | Range Added Per Hour | Full Charge Time (approx.) |
|---|---|---|---|---|
| Level 1 (Standard Outlet) | 120V | 12-16A | 3-5 miles | 40-70 hours |
| NEMA 14-50 Outlet | 240V | 32A | 20-25 miles | 8-12 hours |
| Tesla Wall Connector (32A) | 240V | 32A | 20-25 miles | 8-12 hours |
| Tesla Wall Connector (48A) | 240V | 48A | 30-44 miles | 6-8 hours |
| Third-Party Level 2 (40A) | 240V | 40A | 25-35 miles | 7-10 hours |
As you can see, the amperage makes a big difference in charging speed. Going from a 120-volt outlet to a 240-volt setup with 32 or 48 amps cuts your charging time dramatically.
Most Tesla owners find that a 32-amp setup strikes the best balance between cost and speed. A 48-amp setup charges faster but requires a more robust electrical panel and a dedicated 60-amp circuit breaker.
Tesla Wall Connector vs. NEMA 14-50 Outlet
The two most popular home charging options are the Tesla Wall Connector and the NEMA 14-50 outlet. Here is how they compare:
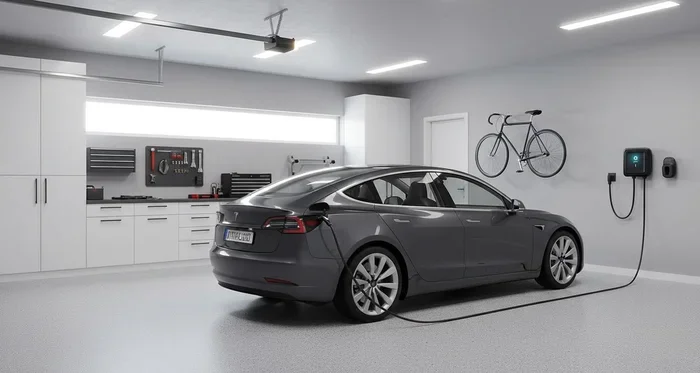
- Tesla Wall Connector: Supports up to 48 amps, charges at the fastest home speed, integrates with Tesla’s app, and looks sleek and professional. It costs around $400 to $500 plus installation.
- NEMA 14-50 Outlet: Supports up to 32 amps, provides solid charging speeds, is easy to install, and costs around $50 to $150 for the outlet plus installation. Many Tesla owners use this as a portable or backup option.
Both options work great. The Tesla Wall Connector is the premium choice, while the NEMA 14-50 outlet is the budget-friendly alternative. Some owners even use both, keeping the Wall Connector as their primary charger and the NEMA outlet as a backup.
What You Need for Home Tesla Charging
Setting up home Tesla charging involves more than just buying a charger. You need the right electrical infrastructure to support it. Here is what you need to consider.
Electrical Panel Capacity
Your home’s electrical panel is the heart of your electrical system. It distributes power to every circuit in your house. To support a Level 2 charger, you need a panel with enough capacity.
Most modern homes have a 200-amp electrical panel, which can easily support a 32-amp or 48-amp charger. Older homes may have 100-amp panels, which might not have enough room for a dedicated charging circuit. If your panel is full, you may need to upgrade it before installing a charger.
It is always a good idea to have a licensed electrician inspect your panel before purchasing a charger. They can tell you exactly what your panel can handle and recommend the right setup.
Dedicated Circuit Requirements
A dedicated circuit means that the charger has its own circuit breaker and wiring, separate from other appliances. This is important for safety and performance.
For a 32-amp charger, you need a 40-amp dedicated circuit. For a 48-amp charger, you need a 60-amp dedicated circuit. The wire gauge must also match the amperage requirements. Thicker wires handle higher amperage without overheating.
Never share a circuit between your charger and other high-power appliances. Doing so can cause the breaker to trip, damage your equipment, or create a fire hazard.
Installation Tips
Here are some practical tips for installing your Tesla charger at home:
- Place the charger near your parking spot to minimize cable length
- Install the charger on an interior wall if possible to protect it from weather
- Use a licensed electrician for all wiring and panel work
- Consider installing a surge protector to safeguard your charger
- Plan for future upgrades by installing a larger conduit if needed
Proper installation ensures safety and maximizes your charging speed. Cutting corners on installation can lead to problems down the road, so invest in quality work from the start.
Common Mistakes People Make When Setting Up Tesla Charging
Even with the best intentions, many Tesla owners make avoidable mistakes when setting up home charging. Here are the most common ones and how to prevent them.
Underestimating Electrical Panel Capacity
The most common mistake is assuming your electrical panel can handle a high-amperage charger without checking first. If your panel is already near capacity, adding a 48-amp charger could overload the system. Always have an electrician assess your panel before making a purchase.
Using an Extension Cord
Some people try to use an extension cord with their charger. This is dangerous and can cause overheating, voltage drop, and even fires. Always plug your charger directly into the wall outlet or hardwire it into your electrical system.
Ignoring Local Electrical Codes
Every area has its own electrical codes and permitting requirements. Ignoring these can result in fines, failed inspections, or safety hazards. Always check with your local building department and hire a licensed electrician who knows the local codes.
Choosing the Wrong Charger Amperage
Buying a 48-amp charger when your electrical panel can only support 32 amps wastes money. Similarly, buying a 24-amp charger when your panel can handle more means you miss out on faster charging speeds. Match your charger to your electrical system’s actual capabilities.
Not Considering Future Needs
If you plan to add another electric vehicle to your household someday, consider installing a larger electrical panel or a second charging circuit now. Retrofitting later is much more expensive and disruptive.
Expert Tips to Optimize Your Tesla Charging at Home
Once you have your charger installed, there are several ways to get the most out of your setup. These tips can help you charge faster, save money, and extend your battery life.
Charge During Off-Peak Hours
Many utility companies offer lower electricity rates during off-peak hours, typically late at night or early in the morning. Setting your Tesla to charge during these hours can save you a significant amount of money over time. You can schedule charging through the Tesla app on your phone.
Keep Your Battery Between 20% and 90%
Constantly charging to 100% or draining to 0% can reduce your battery’s long-term health. For daily use, keeping your battery between 20% and 90% is ideal. Reserve full charges for long trips when you need the extra range.
Precondition Your Battery
In cold weather, preconditioning your battery before charging helps it charge faster and more efficiently. You can do this through the Tesla app or by setting a departure time in your car’s navigation system.
Use Scheduled Charging
The Tesla app lets you set a charging schedule. This is especially useful if you want to take advantage of off-peak electricity rates. Simply set the start and stop times, and your car will handle the rest.
Keep Your Charger Software Updated
Tesla regularly releases software updates that improve charging performance and efficiency. Keeping your car and Wall Connector firmware up to date ensures you are getting the best possible charging experience.
Monitor Your Charging Speed
You can check your charging speed in the Tesla app or on the car’s touchscreen. If you notice a significant drop in charging speed, it may indicate a problem with your electrical setup or the charger itself. Addressing issues early prevents bigger problems later.
These small habits add up over time. Consistent, smart charging practices keep your Tesla running at its best and help you get the most value from your home charging setup.
How Many Amps Does It Take to Charge a Tesla: The Final Answer
So, to answer the question directly: how many amps does it take to charge a Tesla at home? The answer is typically between 24 and 48 amps for Level 2 charging, which is the standard for home setups. The exact number depends on your charger type, your Tesla model, and your home electrical system.
If you want the fastest home charging experience, the Tesla Wall Connector at 48 amps is the way to go. If you are looking for a more budget-friendly option, a NEMA 14-50 outlet at 32 amps works great for most owners. And if you only drive short distances, Level 1 charging at 12 to 16 amps can get the job done, even if it takes longer.
The most important thing is to match your charger to your electrical system. A proper installation by a licensed electrician ensures safety, optimal performance, and peace of mind. Take the time to assess your needs, check your panel capacity, and choose the right setup for your lifestyle.
With the right amperage and a solid home charging setup, you will enjoy the convenience of waking up to a full Tesla every morning. It is one of the best parts of owning an electric vehicle, and once you experience it, you will never want to go back to gas stations.
Frequently Asked Questions
Can I charge my Tesla on a standard 120-volt outlet at home?
Yes, you can charge your Tesla on a standard 120-volt outlet using the mobile connector that comes with the car. This is called Level 1 charging and it draws 12 to 16 amps. However, it is very slow and adds only 3 to 5 miles of range per hour, so it is best suited for overnight charging or short daily drives.
What is the best amperage for home Tesla charging?
Most Tesla owners find that 32 to 48 amps is the sweet spot for home charging. A 32-amp setup provides good charging speeds and works with most electrical panels. A 48-amp setup charges faster but requires a 60-amp dedicated circuit and a more robust electrical panel.
Do I need an electrician to install a Tesla home charger?
Yes, it is strongly recommended to hire a licensed electrician for the installation of any Tesla home charger. Electrical work involves safety risks, and proper installation ensures your charger operates efficiently and safely. An electrician can also assess your panel capacity and make any necessary upgrades.
How long does it take to charge a Tesla at home with 48 amps?
With a 48-amp charger on a 240-volt circuit, most Tesla models can charge from 0 to 100 percent in approximately 6 to 8 hours. The exact time depends on your Tesla model, battery size, and starting charge level. Using a Tesla Wall Connector at 48 amps gives you the fastest home charging speeds available.
Can I use a NEMA 14-50 outlet for Tesla charging?
Yes, a NEMA 14-50 outlet is a popular and practical option for Tesla home charging. It provides up to 32 amps of power on a 240-volt circuit and adds about 20 to 25 miles of range per hour. Many Tesla owners use this as their primary or backup charging solution because it is easy to install and relatively affordable.
Will charging my Tesla at home increase my electricity bill significantly?
Charging your Tesla at home will increase your electricity bill, but the increase is usually much lower than the cost of gasoline for a comparable gas-powered car. On average, it costs about $15 to $25 to fully charge a Tesla at home, depending on your local electricity rates and your driving habits. Charging during off-peak hours can further reduce costs.
=== CONCLUSION ===
Understanding how many amps it takes to charge a Tesla at home is essential for every Tesla owner or anyone considering making the switch to electric. The right amperage setup transforms your daily routine, giving you the convenience of a full charge every morning without the hassle of gas stations.
From Level 1 charging at 12 to 16 amps to Level 2 charging at 24 to 48 amps, there is a setup that fits every home and every budget. The Tesla Wall Connector offers the best home charging experience, while the NEMA 14-50 outlet provides a reliable and affordable alternative.
Take the time to evaluate your electrical system, choose the right charger, and invest in proper installation. Your future self will thank you every morning when you walk out to a fully charged Tesla, ready to take on the day.