Can I Take the Seats Out of My Car to Clean It Properly
Yes, you can take the seats out of your car to clean it properly. Removing car seats gives you full access to hidden dirt, crumbs, and stains. This guide covers the tools, steps, and safety tips for car seat removal and cleaning. You will learn how to deep clean car interior like a pro and reinstall seats without any hassle.
Have you ever looked under your car seats and wondered what treasures — or horrors — are hiding down there? Crumbs. Coins. Mysterious crumbs from months ago. If you have ever thought about giving your car a proper deep clean, you are not alone. Many car owners ask themselves, can I take the seats out of my car to clean it? The short answer is yes. The longer answer is even more helpful, and this guide covers every detail you need.
Removing car seats for cleaning is one of the best things you can do for your vehicle’s interior. It opens up spaces you cannot reach any other way. You get to scrub the floor, clean the seat rails, and eliminate hidden bacteria. Whether you drive a sedan, SUV, or truck, this process works. Let us walk through everything step by step.
Key Takeaways
- Full Access Cleaning: Removing seats lets you reach hidden grime and stains that vacuuming alone cannot fix.
- Safety First: Always disconnect the battery and follow manufacturer guidelines before removing any seats.
- Right Tools Matter: Having the correct tools makes the entire process faster and safer.
- Deep Cleaning Works: A thorough cleaning of the seat rails and carpet area improves your car’s hygiene and smell.
- Reinstallation Is Key: Proper reinstallation ensures your seats are secure and functional every time you drive.
📑 Table of Contents
- Why You Should Consider Removing Car Seats for Cleaning
- How to Remove Car Seats Safely
- Tools and Supplies You Will Need
- Step-by-Step Guide to Deep Cleaning Your Car Interior
- Reinstalling Your Car Seats Correctly
- Common Mistakes People Make When Removing and Cleaning Car Seats
- How Often Should You Deep Clean Your Car Interior?
- Expert Insights on Car Seat Removal and Cleaning
- Key Takeaways
- Conclusion
Why You Should Consider Removing Car Seats for Cleaning
Most people clean the inside of their car with a vacuum and some spray. That is fine for a quick tidy-up. But a deep clean car interior requires more effort. When you take the seats out, you unlock a level of cleanliness that is simply impossible otherwise.
Hidden Dirt and Grime Build-Up
Under your seats collects a surprising amount of dirt. Food crumbs, dust, pet hair, and small debris all settle into the carpet and seat tracks. Over time, this build-up causes bad smells and even affects your car’s air quality. Car seat removal lets you clean these areas completely.
Better Stain Removal
Spilled drinks, muddy shoes, and pet accidents often seep under the seats. When the seats stay in place, you can only treat the surface. By removing them, you can access the stain from every angle. This makes cleaning car seats far more effective.
Improved Air Quality and Hygiene
Dust mites, mold spores, and bacteria love dark, damp places. The area under your seats is exactly that. A thorough vehicle cleaning guide includes cleaning this hidden space. Removing seats helps you eliminate allergens and keeps your car smelling fresh.
Easier Access to Seat Rails and Mechanisms
Your seat rails and adjustment mechanisms collect grease and grime too. When you remove the seat, you can lubricate and clean these parts. This keeps your seat adjustments smooth and extends the life of your seat hardware.
How to Remove Car Seats Safely
Before you start pulling bolts, there are important safety steps. Removing a car seat involves electrical connections and heavy components. Rushing through this can damage your car or your back. Follow these steps carefully.
Step 1: Read Your Vehicle Manual
Every car is slightly different. Your vehicle owner’s manual has specific instructions for seat removal. Some seats have electrical connectors that need to be disconnected first. Others have specific bolt patterns. The manual is your best friend here.
Step 2: Disconnect the Battery
Many modern cars have electrical seat controls, side airbags, and sensors connected to the seat. Disconnecting the car battery prevents any accidental airbag deployment or electrical short. Always remove the negative terminal first and wait a few minutes before starting work.
Step 3: Move the Seat to the Uppermost and Forward Position
Before removing bolts, slide the seat all the way forward and tilt the backrest fully upright. This gives you the most room to work and prevents damage to the seat tracks. Some seats have limited travel, so check your manual for guidance.
Step 4: Locate and Remove the Bolts
Most car seats are held in place by four bolts — two at the front and two at the rear. You will need a socket wrench, usually 14mm or 17mm, depending on your vehicle. Here is what to do:
- Locate the bolt caps on the floor of the car.
- Remove the plastic caps using a flathead screwdriver.
- Use the socket wrench to loosen each bolt.
- Keep all bolts and caps in a safe place.
Step 5: Disconnect Electrical Connectors
If your seat has heated seats, power adjustments, or side airbags, there will be wiring harnesses. Unplug each connector carefully. Take a photo before disconnecting so you remember where everything goes during reinstallation.
Step 6: Lift the Seat Out
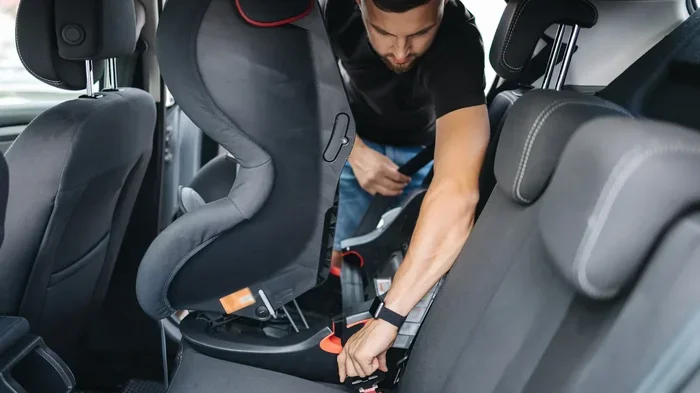
Car seats are heavy — often 30 to 50 pounds. Grab the seat from the bottom frame, not the backrest. Lift straight up and set it on a clean surface or old blanket. Having a second person helps a lot here.
Quick Tips for Safe Seat Removal
- Wear gloves to protect your hands from sharp edges.
- Use a helper for heavy seats, especially in trucks and SUVs.
- Never force a seat if it seems stuck. Double-check for missed bolts or connectors.
- Keep pets and children away from the work area.
Tools and Supplies You Will Need
Having the right tools makes the entire process smoother. You do not need anything fancy, but a few key items will save you time and frustration.
Essential Tools for Seat Removal
- Socket wrench set — 14mm, 17mm, and 19mm are common sizes.
- Flathead and Phillips screwdrivers — for removing bolt caps and trim clips.
- Pliers — helpful for stubborn connectors.
- Ratchet extension — gives you better reach under the seat.
Cleaning Supplies for a Deep Clean
- Vacuum cleaner with a crevice tool and brush attachment.
- Interior car cleaner — a spray safe for all surfaces.
- Upholstery brush — for scrubbing fabric seats.
- Microfiber cloths — for wiping down surfaces without scratching.
- Stain remover — specific to your seat material (fabric or leather).
- Compressed air can — blows out dirt from tight spaces.
- Mild detergent and warm water — for general cleaning.
Optional but Helpful Extras
- Seat cover — protects the seat while it is outside the car.
- Lubricant spray — for cleaning and protecting seat rails.
- Trash bags — for collecting debris and old dirt.
- Tape measure — helps you remember seat position for reinstallation.
Step-by-Step Guide to Deep Cleaning Your Car Interior
Now that your seats are out, it is time to clean. This is where the real magic happens. With full access to your car’s floor, you can tackle every spot that normally stays hidden.
Step 1: Remove Loose Debris
Start by taking out the big stuff. Pick up any large items, trash, or objects from under the seats and around the floor. Shake out floor mats and set them aside for washing. This gives you a clean slate to work with.
Step 2: Vacuum Everything Thoroughly
Use your vacuum with the crevice tool to get into every corner. Pay special attention to:
- The area where the seats were mounted.
- The seat rail tracks on both sides.
- The spaces between the front and rear seats.
- The trunk area and any storage compartments.
Vacuum slowly and go over each area at least twice. This removes fine dust and small particles that a quick pass misses.
Step 3: Clean the Seat Rails and Tracks
Your seat rails accumulate a lot of grime. Spray a small amount of interior cleaner onto the tracks. Use a brush to scrub away built-up grease and dirt. Wipe clean with a microfiber cloth. For stubborn buildup, a toothbrush works great in tight spaces.
Step 4: Scrub the Carpet and Floor
Spray your interior cleaner onto the carpet. Use the upholstery brush to scrub in circular motions. Focus on stained or discolored areas. For tough stains, let the cleaner sit for five minutes before scrubbing. Blot excess moisture with a dry cloth.
Step 5: Clean the Seats Themselves
Now is the perfect time to give your seats a full cleaning too. Here is how to handle different materials:
For Fabric Seats:
- Spray upholstery cleaner and let it sit for two minutes.
- Scrub gently with the upholstery brush.
- Blot with a clean, damp microfiber cloth.
- Allow to air dry completely before reinstalling.
For Leather Seats:
- Wipe with a damp cloth to remove surface dust.
- Apply leather cleaner with a soft cloth.
- Condition the leather after cleaning to prevent cracking.
- Let it dry naturally away from direct sunlight.
Step 6: Clean the Area Where the Seats Were
Do not forget the floor space the seats occupied. This area often has the most concentrated dirt. Use compressed air to blow out dust from vents and tight gaps. Wipe down the entire area with a damp microfiber cloth.
Step 7: Let Everything Dry Completely
Moisture trapped under seats causes mold and bad smells. Make sure every surface is completely dry before putting seats back. Leave the car doors open for at least an hour if the weather is dry. If you are in a hurry, use a fan to speed up drying.
Reinstalling Your Car Seats Correctly
Cleaning is only half the job. Reinstalling the seats incorrectly can lead to rattling, unsafe driving, or damage to your seat mechanism. Take your time with this step.
Step 1: Check All Electrical Connectors
Before placing the seat back in, reconnect all electrical harnesses. Refer to the photos you took during removal. Make sure each connector clicks into place firmly.
Step 2: Lift the Seat Into Position
With the help of a partner, lift the seat and guide it onto the tracks. Make sure the seat rails align with the floor bolts. Do not force the seat if it does not slide in easily.
Step 3: Reinstall the Bolts
Start by hand-threading each bolt to avoid cross-threading. Then use your socket wrench to tighten them firmly. Do not over-tighten, as this can strip the threads or damage the floor pan. Tighten each bolt evenly.
Step 4: Reconnect the Battery
Once all seats are installed, reconnect the battery. Start with the positive terminal first. Test your seat controls — power adjustments, heating, and any other features — to make sure everything works.
Step 5: Test the Seat Movement
Move the seat forward, backward, and tilt it. Listen for any unusual noises. The seat should move smoothly without grinding or sticking. If something feels off, check that all bolts are tight and the tracks are clean.
Common Mistakes People Make When Removing and Cleaning Car Seats
Even with the best intentions, mistakes happen. Avoid these common errors to save time, money, and frustration.
Forgetting to Disconnect the Battery
This is the number one mistake. Working around live electrical connections can damage your car’s wiring or trigger airbag warnings. Always disconnect the battery first.
Losing the Bolts and Caps
Small bolts and plastic caps are easy to lose on the garage floor. Place them in a small bowl or magnet tray as soon as you remove them. Losing these means a trip to the auto parts store and extra delays.
Not Taking Photos Before Disconnecting
Electrical connectors can look very similar. Without photos, you may plug something back in wrong. This can cause error messages on your dashboard or malfunctioning seat features.
Using Too Much Water or Cleaner
Soaking your car’s carpet or floor can lead to mold growth. Use cleaner sparingly and always blot excess moisture. A damp cloth works better than a dripping wet one.
Skipping the Seat Rail Cleaning
Many people clean the visible areas but forget the seat rails. Dirty rails cause squeaking and rough seat movement. Cleaning them is an essential part of the process.
Rushing the Reinstallation
Installing seats back too quickly often leads to loose bolts or missed connectors. A loose seat is a safety hazard. Take the extra time to double-check everything.
How Often Should You Deep Clean Your Car Interior?
A car cleaning tips guide will tell you that frequency depends on how you use your vehicle. Here is a general guideline:
- Every 3 months: Basic vacuuming and surface wipe-down.
- Every 6 months: Full interior detailing including seat removal.
- After spills or accidents: Immediate spot cleaning to prevent stains.
- Seasonal changes: Especially after winter, when salt and mud build up.
If you have pets or children, you may need to clean more often. Regular automotive detailing keeps your car looking great and preserves its resale value.
Expert Insights on Car Seat Removal and Cleaning
Professional detailers agree that seat removal is the single most effective thing you can do for a thorough interior clean. According to automotive experts, most people underestimate how much dirt accumulates under seats. A professional car interior cleaning often starts with seat removal because it provides complete access to the entire cabin floor.
Detailing specialists also recommend using a steam cleaner for fabric seats and carpets. Steam cleaning kills bacteria and removes stains without harsh chemicals. If you want to take your cleaning to the next level, consider renting or buying a portable steam cleaner for your next deep clean session.
Key Takeaways
- Full Access Cleaning: Removing seats lets you reach hidden grime and stains that vacuuming alone cannot fix.
- Safety First: Always disconnect the battery and follow manufacturer guidelines before removing any seats.
- Right Tools Matter: Having the correct tools makes the entire process faster and safer.
- Deep Cleaning Works: A thorough cleaning of the seat rails and carpet area improves your car’s hygiene and smell.
- Reinstallation Is Key: Proper reinstallation ensures your seats are secure and functional every time you drive.
- Regular Schedule: Deep clean your car interior every 6 months for the best results.
Conclusion
Can I take the seats out of my car to clean it? Absolutely yes. Removing your car seats for a deep clean car interior is one of the most effective things you can do. It gives you access to hidden dirt, improves air quality, and keeps your vehicle looking and smelling its best. With the right tools, a little patience, and the steps outlined in this guide, you can clean your car like a professional detailer.
Do not let hidden grime and stubborn stains ruin your driving experience. Take the time to remove, clean, and reinstall your seats properly. Your car — and your nose — will thank you. Start your next car interior detailing project this weekend, and enjoy the satisfaction of a truly clean vehicle.
Frequently Asked Questions
Is it safe to remove car seats on my own?
Yes, it is safe as long as you follow the proper steps. Always disconnect the battery first, refer to your vehicle manual, and handle the electrical connectors carefully. If you feel unsure at any point, ask a friend for help or consult a professional. Most seat removals are straightforward with the right preparation.
Do I need any special tools to remove car seats?
You need a basic socket wrench set, usually 14mm or 17mm, along with a flathead screwdriver for bolt caps. That is all most vehicles require. No special tools are needed, which makes this a very accessible DIY project for car owners of all skill levels.
How long does it take to remove and clean car seats?
For most vehicles, the entire process takes about one to two hours. Seat removal itself takes 15 to 30 minutes. Cleaning the interior and seats takes the most time, usually 45 minutes to an hour. Reinstallation is quick if you have taken photos and organized your bolts.
Will removing my car seats void my warranty?
Generally, removing seats for cleaning does not void your warranty. However, if damage occurs during the removal process, that could be an issue. Always follow your manufacturer’s guidelines and be gentle with all connections. If your car is still under warranty and you are concerned, check with your dealer first.
Can I wash my car seats after removing them?
Yes, you can and should wash your seats after removal. Fabric seats can often be taken to a car wash or cleaned with a deep-cleaner solution. Leather seats need a gentle leather cleaner and conditioner. Washing seats outside the car allows you to clean every surface thoroughly, including the underside and frame.
How do I prevent dirt from building up under my seats?
Use floor mats that cover the entire cabin floor. Shake them out regularly and wash them monthly. Avoid eating in your car when possible. If you must eat in the car, use a small trash bag to collect crumbs immediately. Regular vacuuming every week also prevents build-up from becoming a deep cleaning problem.