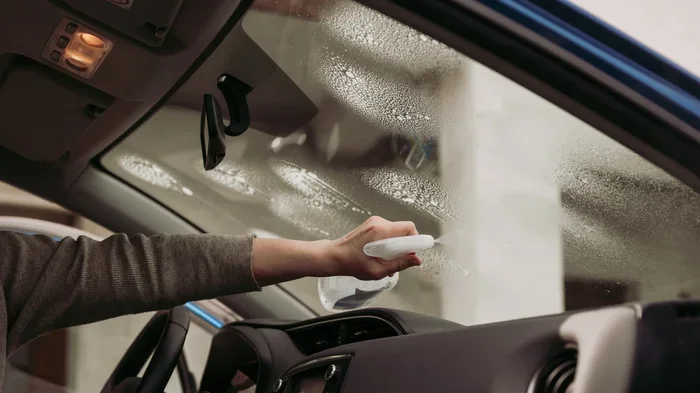
How to Remove Film From Inside Your Car Windshield
How to Remove Film From Inside Your Car Windshield is a common problem caused by off-gassing, sun damage, and daily grime. You can tackle it safely with household items like vinegar and baking soda, or opt for specialized automotive cleaners. This guide walks you through each step, from preparation to prevention, so you get crystal-clear visibility back in no time.
Have you ever looked through your front windshield and noticed a greasy, hazy film stuck to the inside? It’s frustrating, especially when your wipers and washer fluid can’t reach it. How to Remove Film From Inside Your Car Windshield is a question many drivers ask, and the answer is simpler than you might think.
That film usually comes from plastic off-gassing, sun damage, or daily condensation. Over time, it builds up into a stubborn layer that scatters light and reduces visibility. In this guide, I’ll show you exactly how to clean it off safely and keep it from coming back. You’ll learn what causes the film, which tools work best, and the exact steps to get a streak-free shine.
Whether you’re dealing with a light haze or a thick, oily residue, this article covers every scenario. I’ll share household tricks, commercial product picks, and preventive habits that make your next cleaning session a breeze. Let’s get your windshield crystal clear again.
Key Takeaways
- Identify the film type first: oily residue, hard water spots, or sun-damaged haze each need a different approach.
- Use safe tools: microfiber cloths, a plastic scraper, and a steam cleaner work without scratching your glass.
- Try the vinegar solution: a mix of white vinegar and water cuts through light film fast and cheaply.
- Go commercial when needed: dedicated automotive glass cleaners handle stubborn interior windshield film better than household sprays.
- Prevent future buildup: regular wiping, sun shades, and protective coatings keep your windshield clear for months.
- Know when to call a pro: deeply etched or hazy film may need professional treatment to avoid permanent damage.
📑 Table of Contents
- How to Remove Film From Inside Your Car Windshield: A Complete Guide
- The Best Tools and Products for Removing Windshield Film
- Step-by-Step Guide to Removing Film From Your Windshield
- Preventing Film Buildup on Your Car Windshield
- When to Call a Professional for Windshield Film Removal
- Quick Tips, Common Mistakes, and Expert Insights
- Comparison of Cleaning Methods for Interior Windshield Film
- Conclusion: Keep Your Windshield Film-Free
How to Remove Film From Inside Your Car Windshield: A Complete Guide
Before you grab a spray bottle, it helps to understand what you’re fighting. The film on your interior windshield isn’t just dirt—it’s a mix of chemicals, oils, and UV-damaged plastic. Knowing the type of film tells you which method will work fastest.
Why Film Forms on the Inside of Your Windshield
Your car’s dashboard and trim are made of plastics and vinyl. When heat from the sun hits them, they release gases called off-gassing. These gases settle on the cooler glass surface and form a sticky, oily film. Cigarette smoke, lotions, and even the vapors from new seat covers can add to the problem.
Hard water spots from rain or condensation also leave mineral deposits. Over months, these layers bake onto the glass, creating a stubborn haze. The good news is that most of this film is removable with the right technique and a little patience.
The Three Main Types of Interior Windshield Film
Not all film is the same. Here are the three most common types you’ll encounter:
- Oily Residue Film: Caused by off-gassing and lotions. It feels greasy and smears easily.
- Hard Water Mineral Deposits: White, chalky spots from evaporated water droplets. They feel rough to the touch.
- UV-Damaged Haze: A cloudy, etched look from prolonged sun exposure. This type is harder to remove and may require a dedicated cleaner.
Once you identify the type, you can choose the best cleaning method. A light oily film responds well to household solutions, while UV haze often needs a stronger automotive glass cleaner.
The Best Tools and Products for Removing Windshield Film
You don’t need fancy equipment to clean film off your windshield. Many items you already have at home will do the job. For tougher buildup, a few specialized products make the process faster and safer.
Household Items You Already Have
Start with these basics before buying anything special:
- White vinegar: A natural acid that cuts through grease and mineral deposits.
- Baking soda: A mild abrasive that lifts stuck-on film without scratching.
- Dish soap: A few drops in water creates a gentle degreasing solution.
- Microfiber cloths: Lint-free and soft, they won’t leave scratches or streaks.
- Spray bottle: For mixing and applying your cleaning solution evenly.
- Plastic scraper or old credit card: Useful for gently lifting hardened film.
Specialized Cleaners That Work Wonders
When household items aren’t enough, these products are designed for automotive glass:
- Automotive glass cleaners: Brands like Invisible Glass or Rain-X offer streak-free formulas that break down oily film.
- Clay bars for glass: These lift embedded contaminants without scratching the surface.
- Steam cleaners: A handheld steamer softens and loosens stubborn film with heat and moisture.
- Ceramic glass coatings: After cleaning, these protect the windshield and make future cleanup easier.
Using the right product saves time and prevents damage. I always keep a dedicated automotive glass cleaner in my trunk for emergencies.
Step-by-Step Guide to Removing Film From Your Windshield
Now that you have your tools, follow these steps for a clean, clear windshield. I’ll walk you through preparation, application, scrubbing, and final rinsing.
Step 1: Preparation and Safety
Start by parking in a shaded area. Direct sunlight can cause your cleaning solution to dry too quickly, leaving streaks. Roll down the windows slightly to ventilate the car. Gather all your supplies so they’re within arm’s reach.
Put on gloves if you’re using a commercial cleaner. Remove any loose debris from the dashboard and windshield frame with a dry microfiber cloth. This prevents particles from scratching the glass during cleaning.
Step 2: Apply Your Cleaning Solution
For a light film, mix equal parts white vinegar and warm water in a spray bottle. Spray a generous mist onto the windshield, focusing on the hazy areas. Let it sit for two to three minutes so the solution can break down the grease and minerals.
For heavier buildup, sprinkle a thin layer of baking soda over the wet glass, then spray the vinegar solution on top. The fizzing action helps lift stubborn residue. If you’re using a commercial cleaner, follow the product instructions and spray evenly across the glass.
Step 3: Scrubbing and Scraping Techniques
Take a clean microfiber cloth and wipe the windshield in circular motions. Use gentle pressure—let the cleaner do the work. For oily film, a back-and-forth motion works best.
If you encounter hard water spots or baked-on haze, use a plastic scraper at a 30-degree angle. Glide it smoothly across the glass. Never use a metal razor blade on a coated or tinted windshield, as it can cause permanent scratches. For the inside of the glass, a razor blade specifically designed for automotive use is safe when handled carefully.
Step 4: Final Rinse and Drying
Wipe away all residue with a damp cloth rinsed in clean water. Then, dry the windshield immediately with a fresh microfiber towel. This prevents new water spots from forming. Inspect the glass at different angles to check for streaks. If you see any, buff them out with a dry section of the cloth.
Your windshield should now feel smooth and look completely clear. If a slight haze remains, repeat the process or switch to a stronger cleaner.
Preventing Film Buildup on Your Car Windshield
Cleaning the film is only half the battle. Stopping it from coming back saves you hours of work. A few simple habits make a big difference.
Daily Habits That Keep Your Windshield Clear
Wipe down the inside of your windshield with a dry microfiber cloth every time you fill up your gas tank. This removes oils before they have a chance to bond with the glass. Keep a small spray bottle of diluted vinegar in your car for quick touch-ups.
Use a sun shade when parked. It lowers the interior temperature, which reduces off-gassing from the dashboard. Avoid parking under trees that drip sap or bird droppings, as these can accelerate film formation. Also, try not to touch the windshield with your fingers—lotions and natural skin oils contribute to the buildup.
Protective Coatings and Treatments
After a thorough cleaning, apply a ceramic glass coating. These products create a hydrophobic barrier that repels water and oils. They make future cleaning easier and help maintain visibility during rainy drives.
Some ceramic coatings are specifically formulated for interior windshield use. They cure to a hard, clear layer that lasts for months. I recommend reapplying every three to four months for the best protection against interior windshield film.
When to Call a Professional for Windshield Film Removal
Most film can be removed at home, but some situations call for expert help. Knowing when to stop DIY and call a pro saves you from making the problem worse.
Stubborn Stains That Won’t Budge
If you’ve tried vinegar, baking soda, and commercial cleaners and the film still won’t lift, it might be etched into the glass. Deep etching from hard water minerals or UV damage requires professional-grade tools. A detailing service can use a rotary polisher with a glass-safe compound to restore clarity.
Also, if your windshield has a special coating or defogger lines, be extra careful. Aggressive scrubbing can damage these elements. A professional will know how to clean around them safely.
Cost vs. DIY Considerations
A professional interior windshield cleaning typically costs between $50 and $150, depending on the severity of the film. If you have the time and basic supplies, DIY is much cheaper. However, if the film is causing glare or reducing visibility on your daily commute, investing in a pro is worth the safety benefit.
Quick Tips, Common Mistakes, and Expert Insights
Here’s where I share the shortcuts and warnings that make the whole process smoother.
Quick Tips for Success
- Work in the shade: Cleaning in direct sun leaves streaks and dries your solution too fast.
- Use two cloths: One for applying the cleaner, one for drying. This prevents re-depositing grime.
- Replace your microfiber cloths often: Dirty cloths scratch glass and spread film instead of removing it.
- Clean on a cool day: The lower temperature keeps the solution wet longer, giving it more time to dissolve the film.
- Add a drop of dish soap to vinegar: This boosts the degreasing power for oily residue without harsh chemicals.
Common Mistakes to Avoid
- Using paper towels: They leave lint and can scratch the glass. Stick to microfiber.
- Applying too much pressure: Let the cleaner dissolve the film. Heavy scrubbing can create micro-scratches that attract more dust.
- Skipping the rinse: Residue from cleaning solutions can turn into a new film. Always rinse with clean water and dry thoroughly.
- Ignoring the dashboard: Film often comes from the dash. Clean the plastic surfaces too to stop the cycle.
Expert Insight: A Pro’s Trick for Stubborn Haze
Professional detailers often use a steam cleaner combined with a clay bar for glass. The steam softens the baked-on film, and the clay bar lifts it away without chemicals. If you have access to a steam cleaner, this method is incredibly effective for heavy UV haze. Hold the steamer a few inches from the glass, let the steam penetrate for a minute, then glide the clay bar across the surface. Wipe away the residue with a damp cloth and finish with a dry buff.
Comparison of Cleaning Methods for Interior Windshield Film
Not all methods are equal. Here’s a quick comparison to help you choose the right approach for your situation.
| Method | Best For | Cost | Difficulty | Streak Risk |
|---|---|---|---|---|
| Vinegar and Water | Light oily film and mineral deposits | Very low | Easy | Low if dried properly |
| Baking Soda Paste | Moderate buildup and stubborn spots | Very low | Medium | Medium—requires thorough rinsing |
| Commercial Glass Cleaner | General maintenance and light film | Low | Easy | Low with quality microfiber |
| Steam Cleaner + Clay Bar | Heavy UV haze and deep etching | Medium to high | Medium | Very low when done correctly |
| Professional Detailer | Severely etched or coated windshields | High | None (you just pay) | None |
Conclusion: Keep Your Windshield Film-Free
How to Remove Film From Inside Your Car Windshield doesn’t have to be a daunting chore. With the right tools, a little patience, and the steps outlined above, you can restore full clarity to your glass in under an hour. Start by identifying the type of film, choose the appropriate cleaning method, and follow the preparation and scrubbing techniques carefully. Prevention is just as important—simple daily habits and protective coatings will keep that haze from returning.
Remember, a clear windshield means safer driving. When you can see the road without glare or distortion, you react faster and drive with confidence. Try these methods today, and enjoy the difference a clean windshield makes. Your future self will thank you every time you get behind the wheel.
Frequently Asked Questions
What causes the film on the inside of a car windshield?
The film is usually caused by off-gassing from dashboard plastics, sun damage, and oils from lotions or skin. Hard water deposits from condensation can also contribute to the buildup over time.
Can I use a razor blade to remove film from my windshield?
Yes, but only use a razor blade specifically designed for automotive glass and only on the inside of an untreated windshield. Hold it at a low angle and use gentle pressure to avoid scratching the glass.
How long does it take to remove film from a car windshield?
For light film, about 30 minutes. Heavier buildup may take an hour or more, especially if you need to repeat the process or use a steam cleaner and clay bar.
Is vinegar safe to use on car windshield glass?
Absolutely. White vinegar is a natural, safe cleaner that cuts through oily film and mineral deposits. Just avoid using it on tinted windshields if you’re unsure about the tint adhesive.
How can I prevent film from coming back on my windshield?
Regularly wipe the interior glass with a microfiber cloth, use a sun shade when parked, and apply a ceramic glass coating every few months. Cleaning the dashboard and plastic surfaces also reduces off-gassing.
When should I seek professional help for windshield film?
If the film is deeply etched, doesn’t respond to home methods, or you have a coated or tinted windshield, a professional detailer can safely restore clarity without risking damage.