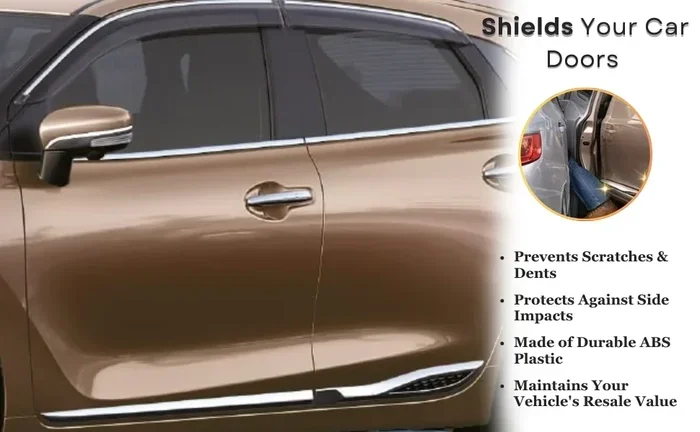
Car Door Side Beading The Ultimate Guide to Installing
Car door side beading protects your vehicle from damage and gives it a polished, custom look. This guide walks you through everything you need to know, from choosing the right beading to a step-by-step installation process that anyone can follow. Whether you are a beginner or a seasoned DIYer, you will find practical tips and expert advice to get the job done right.
Have you ever noticed how some cars look like they rolled off the showroom floor even after years of use? A big part of that secret lies in the details. One detail that makes a huge difference is car door side beading. It is that sleek strip of trim that runs along the edge of your door panels. It does more than just look good. It protects your vehicle from everyday wear and tear.
If you have been thinking about adding or replacing side beading on your car, you are in the right place. This guide covers everything from what side beading is to how to install it yourself. We will walk you through each step with clear instructions and helpful tips. By the end, you will feel confident enough to tackle this project on your own.
Car door side beading is one of those small upgrades that makes a big impact. It is affordable, easy to install, and it instantly upgrades the look of your ride. Let us dive in and explore everything you need to know.
Key Takeaways
- Car door side beading shields your doors from dings, scratches, and weather damage while enhancing your vehicle’s appearance.
- You need basic tools like a measuring tape, adhesive, and a trim removal tool to complete the job.
- Choosing the right type of beading — whether chrome, rubber, or plastic — depends on your vehicle model and personal style.
- Following a clean, step-by-step installation process ensures a smooth, bubble-free finish that lasts for years.
- Avoiding common mistakes like dirty surfaces and improper measurement saves time and prevents costly do-overs.
- Regular maintenance keeps your side beading looking sharp and functioning properly for the long haul.
- DIY installation saves money compared to professional shop fees and gives you full control over the result.
📑 Table of Contents
- What Is Car Door Side Beading?
- Why You Need Side Beading on Your Car Doors
- Tools and Materials You Will Need
- Step-by-Step Guide to Installing Car Door Side Beading
- Common Mistakes to Avoid
- Maintenance Tips for Long-Lasting Side Beading
- DIY vs Professional Installation: Which Is Right for You?
- Where to Buy Car Door Side Beading
- How to Choose the Right Side Beading for Your Vehicle
- How Long Does Car Door Side Beading Last?
- Can You Paint Car Door Side Beading?
- Conclusion
What Is Car Door Side Beading?
Car door side beading refers to the trim piece that attaches to the outer edge of your car door panel. It goes along the seam where the door meets the body of the vehicle. This strip of material can be made from many things. Common materials include chrome, rubber, plastic, and even stainless steel.
The main job of side beading is protection. It acts as a barrier between your door panel and the outside world. When you open your car in a parking lot, other doors can bump against yours. Without beading, those bumps can leave dents and scratches. Side beading absorbs that impact and keeps your door looking pristine.
But protection is not the only benefit. Side beading also seals the edge of your door. This helps keep water, dust, and debris from getting inside the door panel. Over time, moisture can cause rust and damage to internal parts like the window mechanism and wiring. A good bead of trim keeps all of that out.
Types of Car Door Side Beading
Not all side beading is the same. There are several types to choose from, and each has its own advantages. Here is a quick look at the most popular options.
- Chrome side beading: This is the most classic and popular choice. It gives your car a shiny, polished look. Chrome beading is durable and easy to clean. It works well on both older and newer vehicles.
- Rubber side beading: Rubber is flexible and absorbs shocks well. It is a great option if you want maximum protection. Rubber beading is often used on work trucks and vehicles that see heavy use.
- Plastic side beading: Plastic trim is lightweight and affordable. It comes in many colors and styles. Plastic beading is common on modern cars and SUVs.
- Stainless steel beading: This option offers a premium look and excellent durability. Stainless steel resists rust and corrosion. It is a top choice for car enthusiasts who want a long-lasting upgrade.
When choosing the right type, consider your vehicle model, your budget, and your personal style. Each material has its own charm and purpose.
Why You Need Side Beading on Your Car Doors
You might wonder if side beading is really necessary. The answer is yes. Here is why car door side beading is a smart addition to any vehicle.
First, it protects your doors from door dings. Parking lot dings are one of the most common forms of car damage. When another driver opens their door into yours, the beading takes the hit. Without it, your paint job takes the damage. Over time, these small dings can lead to rust and costly repairs.
Second, side beading improves the weather seal of your doors. It helps prevent rainwater from seeping into the door cavity. Water intrusion is a leading cause of rust, mold, and electrical problems in cars. By adding a layer of protection, you are investing in the long-term health of your vehicle.
Third, side beading enhances the look of your car. A clean strip of trim along the door edge gives your vehicle a finished, professional appearance. It is one of those small details that people notice. Whether your car is old or new, side beading can make it look refreshed and well-maintained.
Finally, replacing worn or damaged beading is much cheaper than repainting a door or fixing rust damage. A simple trim installation job can save you hundreds of dollars in repair costs over the life of your vehicle.
Tools and Materials You Will Need
Before you start the car door side beading installation process, gather everything you need. Having the right tools makes the job faster and easier. Here is a complete list of what you will need.
Essential Tools
- Measuring tape or ruler
- Trim removal tool or flat-head screwdriver
- Clean cloth or microfiber towel
- Isopropyl alcohol or surface cleaner
- Masking tape
- Utility knife or scissors
- Rubber mallet or soft hammer
- Heat gun or hair dryer (optional)
Materials Needed
- Car door side beading (measured to your door length)
- Automotive trim adhesive or 3M double-sided tape
- Trim clips (if your vehicle uses clip-on beading)
- Protective gloves
- Owner’s manual for your vehicle
Take the time to measure your door carefully before purchasing the beading. Most side beading comes in standard lengths, but some vehicles need custom cuts. Measure twice and cut once. This simple rule will save you a lot of frustration.
Step-by-Step Guide to Installing Car Door Side Beading
Now for the fun part. Installing car door side beading is a straightforward project that most people can finish in about an hour per door. Follow these steps for a clean, professional-looking result.
Step 1: Remove the Old Beading (If Applicable)
If you are replacing old beading, start by removing it carefully. Use a trim removal tool or a flat-head screwdriver wrapped in a cloth to avoid scratching the door panel. Gently pry under the edge of the old beading and work your way around the door. Go slowly. Rushing this step can damage the door paint or the panel itself.
Once the old beading is loose, pull it away from the door. Check the door surface underneath for any adhesive residue. Use isopropyl alcohol and a clean cloth to remove any sticky leftover glue. The surface must be completely clean and dry before you apply new beading.
Step 2: Measure and Cut the New Beading
Hold the new beading along the door edge to check the fit. Leave a few inches of extra length on each end for adjustment. Use masking tape to temporarily hold the beading in place while you check the alignment. Make sure the beading sits evenly along the entire door edge.
When you are happy with the fit, use a utility knife or scissors to cut the beading to the correct length. Cut at a slight angle on the ends for a clean, seamless joint where the two pieces meet at the door edges.
Step 3: Clean the Door Surface
This step is critical. Use isopropyl alcohol and a microfiber cloth to wipe down the door edge where the beading will go. Any dirt, oil, or wax will prevent the adhesive from sticking properly. Let the surface dry completely before moving to the next step.
Step 4: Apply the Adhesive
If your beading comes with pre-attached adhesive, skip this step and go to Step 5. If not, apply a thin, even line of automotive trim adhesive along the back of the beading. Use a steady hand and apply consistent pressure. Too much adhesive can squeeze out and create a messy look. Less is more in this case.
Alternatively, you can use 3M double-sided automotive tape. This option is cleaner and easier for beginners. Just make sure the tape is rated for outdoor use and automotive applications.
Step 5: Press the Beading into Place
Starting at the top of the door, carefully press the beading onto the door edge. Work your way down slowly. Use your hands to press the beading firmly onto the surface. Make sure it aligns evenly with the door edge on both sides.
Once the beading is in place, use a rubber mallet or the handle of a soft hammer to gently tap the beading into the door edge. This helps the adhesive bond more securely and ensures a tight fit. Go over the entire length of the door with the mallet.
Step 6: Secure the Ends and Let It Cure
Fold the extra beading at each end of the door neatly. Use trim clips or a small dab of adhesive to secure the ends in place. The ends should look clean and finished, not loose or jagged.
Now let the adhesive cure. Most automotive adhesives need at least 24 hours to fully set. During this time, avoid opening and closing the door too much. Keep the car in a dry, sheltered area if possible. After 24 hours, your new car door side beading is ready for the road.
Pro Tips for a Flawless Installation
- Use a heat gun on low setting if the beading is stiff and hard to bend around curves. Gentle heat makes the material more flexible.
- Work in a shaded area or indoors. Direct sunlight can cause the adhesive to set too quickly before you can adjust the position.
- Have a friend help you hold the beading in place while you press it down. An extra pair of hands makes a big difference.
- Take your time. Rushing the job is the number one cause of uneven or bubbly beading.
Common Mistakes to Avoid
Even with clear instructions, mistakes can happen. Here are the most common errors people make when installing car door side beading and how to avoid them.
- Skipping the surface cleaning step: Dirty surfaces cause adhesive failure. Always clean the door edge with isopropyl alcohol before applying any beading.
- Measuring incorrectly: A beading piece that is too short or too long looks sloppy. Measure your door carefully and double-check your numbers before cutting.
- Using the wrong adhesive: Not all adhesives work on automotive trim. Use products specifically designed for car bodywork and exterior trim. Regular household glue will not hold up against weather and vibration.
- Applying too much adhesive: Excess adhesive oozes out and creates ugly bumps. Apply a thin, even line and let the pressure do the rest.
- Ignoring temperature conditions: Most adhesives work best between 50 and 80 degrees Fahrenheit. Installing beading in extreme cold or heat can compromise the bond.
- Not pressing firmly enough: Weak pressure leads to gaps and bubbling. Use a rubber mallet and your hands to ensure full contact between the beading and the door surface.
By avoiding these mistakes, you will save time, money, and the hassle of redoing the job.
Maintenance Tips for Long-Lasting Side Beading
Your new car door side beading will last for years with proper care. Here are some simple maintenance tips to keep it looking great.
- Clean it regularly: Use a mild car wash soap and a soft cloth to clean the beading. Avoid harsh chemicals or abrasive scrubbers that can scratch the finish.
- Wax it along with your car: Applying car wax to the beading protects it from UV rays and weather damage. Use a gentle wax and avoid getting it on the adhesive area.
- Check for loose spots: Periodically run your fingers along the beading to feel for any loose areas. If you find one, apply a small amount of automotive adhesive and press it back into place.
- Address chips and scratches quickly: If the beading gets damaged, repair it right away. Small chips can lead to moisture intrusion and rust underneath.
- Avoid high-pressure car washes directly on the beading: The force of high-pressure water can loosen the adhesive over time. Use a gentle stream or hand wash instead.
With these simple habits, your side beading will continue to protect your doors and look great for many years to come.
DIY vs Professional Installation: Which Is Right for You?
One question many car owners ask is whether they should install car door side beading themselves or pay a professional. Here is a quick comparison to help you decide.
| Factor | DIY Installation | Professional Installation |
|---|---|---|
| Cost | Low (just the cost of materials) | Higher (labor plus materials) |
| Time | About 1 hour per door | 1 to 2 hours total |
| Skill Level Required | Beginner-friendly | Not required |
| Quality of Result | Great if done carefully | Consistently professional |
| Tools Needed | Basic household tools | Provided by the shop |
| Flexibility | Work at your own pace | Scheduled appointment needed |
For most people, DIY installation is the better choice. The process is simple, the tools are basic, and the savings are significant. You also get the satisfaction of doing the job yourself. However, if you are not comfortable working on your car or if you have a luxury vehicle where precision matters, a professional can deliver a flawless result.
Where to Buy Car Door Side Beading
Finding the right car door side beading is easier than you might think. Here are some of the best places to look.
- Auto parts stores: Stores like AutoZone, O’Reilly, and Advance Auto Parts carry a wide selection of side beading for popular vehicle models.
- Online retailers: Amazon, eBay, and specialty automotive websites offer thousands of options. You can filter by vehicle make, model, and year to find the perfect fit.
- Dealerships: Your car dealership can order OEM (original equipment manufacturer) beading that matches your vehicle exactly. This is the best option for a seamless factory look, though it may cost more.
- Aftermarket suppliers: Companies like Automotive Styling and Chrome World offer custom and specialty beading options. These are great if you want a unique look or need a specific material.
Before you buy, check your vehicle owner’s manual for trim specifications. Some vehicles require specific beading profiles that may not be interchangeable with other models.
How to Choose the Right Side Beading for Your Vehicle
Choosing the right car door side beading comes down to a few key factors. Think about your vehicle type, your driving conditions, and your personal style. Here are some guidelines to help you make the best choice.
If you drive a classic car or a truck, chrome beading is a timeless choice. It complements the traditional look of older vehicles and adds a touch of elegance. For modern cars and SUVs, plastic or rubber beading in matching colors often blends best with the factory design.
If you live in an area with harsh weather, choose a durable material like stainless steel or heavy-duty rubber. These materials stand up best to rain, snow, salt, and UV exposure. If you park your car outdoors all the time, the extra protection is well worth the investment.
Finally, consider the ease of installation. Some beading types are easier to work with than others. Pre-taped beading with 3M adhesive is the most beginner-friendly option. It requires no additional adhesive and provides a strong hold right out of the package.
How Long Does Car Door Side Beading Last?
The lifespan of car door side beading depends on the material and how well you maintain it. On average, quality side beading lasts between 5 and 15 years. Chrome and stainless steel beading tend to last the longest, often exceeding 10 years with proper care. Rubber beading may need replacement every 5 to 7 years due to natural wear and weather exposure.
Factors that affect longevity include sun exposure, salt exposure, how often you wash your car, and the quality of the adhesive used. Taking good care of your beading will extend its life significantly.
Can You Paint Car Door Side Beading?
Yes, you can paint side beading to match your car color, but it requires some preparation. First, sand the surface lightly with fine-grit sandpaper to help the paint stick. Clean the surface thoroughly, then apply a primer designed for automotive plastic or metal. Spray on automotive paint in thin, even coats. Finish with a clear coat for protection and shine.
Keep in mind that painting beading may void any warranty on the product. If you are unsure, test a small hidden area first. Some beading materials do not accept paint well, so it is always good to check before committing to a full paint job.
Conclusion
Car door side beading is one of the simplest and most effective ways to protect your vehicle and enhance its appearance. Whether you are dealing with worn-out old trim or starting from scratch, this project is well within the reach of any car owner. With the right materials, basic tools, and a little patience, you can achieve a professional-quality finish that will last for years.
The steps outlined in this guide give you everything you need to know. From choosing the right type of beading to avoiding common installation mistakes, you are now equipped to take on this project with confidence. Remember to clean your surfaces thoroughly, measure carefully, and apply even pressure during installation. These small details make all the difference in the final result.
So go ahead and give your car the upgrade it deserves. A fresh set of side beading not only protects your doors but also turns heads wherever you go. Your vehicle will thank you for it. Happy installing!
Frequently Asked Questions
What is car door side beading used for?
Car door side beading protects your door panels from dings, scratches, and weather damage. It also seals the door edge to prevent water and debris from entering the door cavity. Beyond protection, it gives your car a polished, finished look that enhances its overall appearance.
Can I install car door side beading myself?
Yes, installing side beading is a beginner-friendly DIY project. You only need basic tools like a measuring tape, adhesive, and a trim removal tool. Most people can complete the job in about an hour per door. Just follow the steps carefully and take your time for the best results.
How much does car door side beading cost?
The cost of side beading varies depending on the material and your vehicle model. On average, a set of side beading costs between 20 and 80 dollars. Chrome and stainless steel options tend to be on the higher end, while plastic and rubber beading are more affordable. DIY installation saves you the cost of professional labor.
How do I remove old car door side beading?
Use a trim removal tool or a flat-head screwdriver wrapped in a cloth to gently pry up the old beading. Work slowly to avoid scratching the door panel. Once removed, clean the surface with isopropyl alcohol to remove any adhesive residue before applying new beading.
What is the best adhesive for car door side beading?
Automotive-grade trim adhesive or 3M double-sided automotive tape are the best choices. These products are designed to withstand outdoor conditions, temperature changes, and road vibration. Avoid using household glue or general-purpose tape, as they will not hold up over time.
How long does car door side beading last?
With proper care, quality side beading lasts between 5 and 15 years. Chrome and stainless steel beading typically last the longest. Regular cleaning, waxing, and prompt repairs of any damage will help extend the life of your side beading significantly.