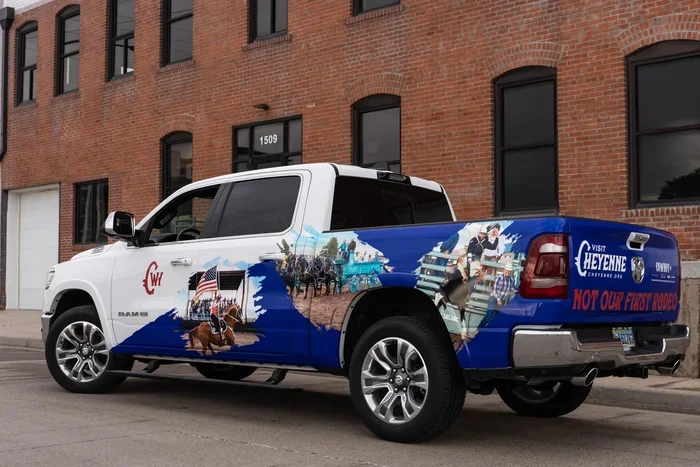
Can I Wrap My Own Truck Yourself And Save Big Money
Yes, you absolutely can wrap your own truck and save hundreds — even thousands — of dollars compared to hiring a shop. With the right vinyl wrap kit, some patience, and our step-by-step guidance, you can achieve a professional-looking truck wrap that turns heads on every road. Whether you want a full truck makeover or custom truck graphics, this guide gives you everything you need to succeed with DIY truck wrap installation.
Key Takeaways
- DIY truck wrapping can save you $1,000 to $3,000+ compared to professional installation costs for the same job.
- You will need specific tools including a heat gun, squeegees, cutting blades, and a clean workspace to wrap your own truck properly.
- Surface preparation is the most critical step — a clean, smooth surface ensures your truck wrap adheres perfectly and lasts for years.
- Patience and technique matter more than experience — even first-timers can achieve great results by following proven methods.
- Common mistakes include rushing the process, skipping surface prep, and using the wrong wrap material for your truck.
- Professional help is still recommended for complex wraps involving curved surfaces, full vehicle designs, or specialty finishes.
- High-quality vinyl wrap material lasts 5 to 7 years** on average when properly installed and maintained.
📑 Table of Contents
- What Does It Mean to Wrap Your Own Truck?
- How Much Can You Save by Wrapping Your Own Truck?
- What You’ll Need to Wrap Your Own Truck
- Step-by-Step Guide to Wrapping Your Own Truck
- Common Mistakes When DIY Truck Wrapping
- When to Call a Professional Instead
- Maintaining Your Truck Wrap for Long-lasting Results
- Conclusion: Is Wrapping Your Own Truck Worth It?
What Does It Mean to Wrap Your Own Truck?
A truck wrap is when you cover your vehicle’s body panels with a special vinyl wrap material instead of painting. Think of it like putting a giant, high-quality sticker on your truck. The vinyl comes in rolls, and you smooth it over your truck’s surface to create a completely new look.
So when people ask, “Can I wrap my own truck?” the answer is yes. Auto wrapping has become a popular truck customization method because it’s less permanent than a paint job. You can peel it off later and reveal your original factory paint underneath. That alone makes it an attractive option for truck owners everywhere.
There are different types of vehicle wraps you can try. A full wrap covers the entire truck. A partial wrap covers just certain panels like the hood, roof, or tailgate. Truck graphics and vinyl decals fall somewhere in between. No matter what style you want, the basic process stays the same.
Why Truck Owners Are Choosing Wraps Over Paint
More truck owners are choosing wraps over traditional paint — and for good reason. A truck makeover through wrapping costs far less than a full paint job. A quality paint job can run $5,000 or more. A professional truck wrap typically costs between $2,500 and $5,000. But a DIY truck wrap? You might spend only $500 to $1,500 on materials.
Wraps also protect your original paint. The adhesive vinyl acts as a shield against scratches, minor dings, road debris, and UV damage. That means your truck’s factory finish stays pristine underneath. If you ever want to sell the truck, the original paint is still there waiting.
Another big benefit is flexibility. Wrap removal is simple compared to repainting. You change your mind, you peel it off. It is that easy. This flexibility is a huge draw for people who like to keep things fresh with their truck livery.
How Much Can You Save by Wrapping Your Own Truck?
This is the big question, right? Let us break down the numbers. When you hire a shop to wrap your own truck for you, labor makes up a huge chunk of the total cost. A full truck wrap at a professional shop typically costs between $2,500 and $5,000 or even more. That includes the wrap material plus the labor to install it.
When you do it yourself, you only pay for the wrap material and tools. A quality wrap kit for a full-size truck usually runs between $500 and $1,500 depending on the brand and coverage. Add another $100 to $300 for tools if you do not already own them. Your total cost might land between $600 and $1,800.
That means you could easily save $1,000 to $3,000+ by tackling the project yourself. Over time, those savings add up fast. If you enjoy truck customization and want to swap wraps every few years, the savings become even more dramatic.
Cost Comparison: DIY vs Professional Truck Wrap
| Expense | DIY Truck Wrap | Professional Truck Wrap |
|---|---|---|
| Wrap Material | $500 – $1,500 | $500 – $1,500 |
| Labor | $0 | $2,000 – $3,500 |
| Tools and Supplies | $100 – $300 | $0 (included) |
| Total Cost | $600 – $1,800 | $2,500 – $5,000+ |
| Estimated Savings | $1,000 – $3,000+ | |
As you can see, the savings are significant. Even if you make a few mistakes along the way, the total cost still falls well below professional pricing. Just keep in mind that your time counts too. A full wrap installation can take anywhere from 8 to 20 hours depending on your skill level and the truck size.
Quick Tips for Maximizing Savings
- Buy wrap material in bulk or during sales from reputable suppliers online.
- Borrow or rent tools instead of buying everything brand new.
- Start with a partial wrap to practice your skills before committing to a full truck wrap.
- Watch tutorial videos from experienced wrappers to learn techniques before you begin.
What You’ll Need to Wrap Your Own Truck
Having the right tools and materials makes all the difference when you wrap your own truck. You cannot just slap vinyl on a dirty truck and expect it to look good. Proper preparation and quality supplies are essential for a smooth, long-lasting finish.
Wrap Material Options
Not all wrap material is created equal. Here are the most common options:
- Cast vinyl: The highest quality option. It conforms well to curves and complex shapes. It also lasts longer — typically 5 to 7 years. This is what professional shippers recommend.
- Calendered vinyl: A budget-friendly alternative. It works well on flat or gently curved surfaces. However, it may not last as long — usually 3 to 5 years.
- Gloss vinyl: Gives your truck a shiny, mirror-like finish. Very popular for bold color changes.
- Matte vinyl: Creates a flat, non-reflective look. Huge trend in truck graphics and modern styling.
- Satin vinyl: A middle ground between gloss and matte. Slightly shiny without being too flashy.
- Chrome or specialty vinyl: Mirrored, metallic, or textured finishes. These require more skill to install due to their rigidity.
For first-timers, matte or gloss cast vinyl is the easiest to work with. It stretches nicely and forgives small mistakes during wrap installation.
Essential Tools and Supplies
Here is a checklist of what you need before you start truck wrapping:
- Heat gun or hair dryer (for warming and stretching vinyl)
- Squeegees (soft and hard edge tools for smoothing vinyl)
- Cutting blade or sharp utility knife
- Measuring tape and ruler
- Masking tape and painter’s tape
- Microfiber cloths and cleaning solution
- Rubbing alcohol or panel prep spray
- Protective gloves
- Plastic trim tools for removing clips and panels
- Lubricant or application fluid (optional but helpful)
You do not need to buy the most expensive tools on the market. A basic kit will get the job done. Just make sure your cutting blade is sharp. A dull blade will tear the vinyl instead of making clean cuts through vinyl decal material and wrap sections.
Preparing Your Truck Before You Wrap Your Own Truck
Preparation takes up about half the total project time, but it is absolutely worth the effort. A clean surface ensures the adhesive vinyl bonds properly and does not peel off later.
First, wash your entire truck thoroughly. Use a quality car wash soap and microfiber towels. Avoid automatic car washes before wrapping — they can leave wax residue that blocks adhesion. Next, inspect every panel for dents, rust, or peeling paint. The wrap will highlight these imperfections, so fix them first if possible.
Then, degrease every surface. Use rubbing alcohol or a dedicated panel prep spray. Wipe down each panel until it feels completely clean and slightly sticky to the touch. This step ensures maximum adhesion for your truck wrap. Skipping this is one of the most common reasons DIY wraps fail early.
Step-by-Step Guide to Wrapping Your Own Truck
Now comes the fun part. Here is a detailed walkthrough on how to wrap your own truck from start to finish. We will walk through each stage so you know exactly what to do.
Step 1: Plan Your Design and Measure
Before you touch any vinyl, plan your design. Decide whether you want a full wrap or a partial wrap. If you are using a wrap design with specific graphics, print out references and measure your truck’s panels. Write down the dimensions of every section you plan to cover.
Measure twice and cut once. This old rule applies perfectly to auto wrapping. Having accurate measurements prevents waste and reduces the number of seams on your finished truck wrap.
Step 2: Start with the Largest, Flattest Panels
Begin your DIY truck wrap on the easiest surfaces first. The hood, tailgate, and side panels are great starting points. These areas are relatively flat and give you practice before tackling curves and edges.
Peel back about 12 inches of the vinyl backing. Align the exposed edge with the panel’s edge. Press it firmly into place. Then slowly peel the rest of the backing away while using your squeegee to push the vinyl smoothly across the panel. Work from the center outward toward the edges. This technique reduces air bubbles and keeps everything tight.
Step 3: Use Your Heat Gun on Curves and Edges
When you reach curved areas like fenders, bumpers, or mirrors, break out your heat gun. Warm the vinyl gently — you want it pliable, not bubbling hot. Heated vinyl wrap stretches more easily and conforms to tight shapes without creasing.
Apply heat in smooth, sweeping motions. Do not linger in one spot too long. Once the vinyl is warm, use your squeegee or a plastic trim tool to press it into the curve. Work slowly and patiently. Rushing this step leads to wrinkles and bubbles that are very difficult to fix later in the wrap installation process.
Step 4: Cut Excess Vinyl Cleanly
Once the vinyl is smoothed into place, trim the excess with a sharp cutting blade. Hold the blade at a slight angle and cut away from the panel edge. Use your fingers or a plastic prying tool to gently stretch the trimmed piece around the edge and press it flush against the inner panel.
For door jambs and tight spaces, you may need to remove the door entirely or partially. This gives you better access and prevents the wrap from bunching up. Label everything carefully so you can put it all back together correctly when you wrap your own truck.
Step 5: Handle Seams and Overlaps Properly
When two pieces of vinyl meet — called a seam — you want them to overlap slightly. Apply a thin strip of overlapping adhesive or use the heat gun to bond the edges together smoothly. Proper seam work makes your truck graphics look seamless and professional rather than patched together.
Expert Insight: The Secret to Flawless Seams
Experienced wrappers recommend using a heat gun on seams at a low temperature while pressing both edges together with a hard squeegee. This fuses the vinyl edges into nearly invisible joints. It takes practice, but once you get the hang of it, your truck livery will look like it came straight from a top shop.
Step 6: Final Inspection and Touch-Ups
Walk around your truck and inspect every inch. Look for air bubbles, lifted edges, or visible seams. Use your heat gun on any problem areas and press them back down firmly. Small bubbles often disappear with gentle heat and pressure. Any sharp creases may require you to peel back that section and restart for the cleanest finish on your body wrap.
Common Mistakes When DIY Truck Wrapping
Even with the best tools and materials, mistakes happen. Here are the most common errors people make when they wrap their own truck — and how to avoid them.
Mistake 1: Skipping Surface Preparation
This is the number one reason DIY wraps fail early. If your truck surface is dirty, greasy, or waxy, the adhesive vinyl will not stick properly. The wrap may start peeling within weeks. Always clean and degrease every panel thoroughly before applying any material. Never skip this step.
Mistake 2: Rushing the Process
Wrapping your own truck requires patience. Trying to finish in one afternoon when you are tired or rushed leads to sloppy work. bubbles, and misalignment. Break the job into multiple sessions if needed. Each panel deserves your full attention and care.
Mistake 3: Using the Wrong Wrap Material
Not every wrap kit is suitable for every truck. Cheap calendered vinyl may not stretch enough around complex curves. If your truck has lots of body lines, contours, or curves, invest in quality cast vinyl. It costs more upfront but saves you headaches — and potentially the entire wrap — later on.
Mistake 4: Overheating the Vinyl
Your heat gun is your best friend, but it can also be your worst enemy. Too much heat shrinks the vinyl and causes it to pull away from edges once it cools. Keep the heat gun moving at all times. Test on a small hidden area first to get comfortable with the temperature setting.
Mistake 5: Ignoring Weather Conditions
Try to wrap your truck in a controlled environment. Direct sunlight heats the panels and causes premature vinyl adhesion before you can position it correctly. Cold temperatures make vinyl stiff and difficult to stretch. The ideal temperature range for wrap installation is between 60°F and 80°F. A garage or covered workspace works best.
Quick Tips to Avoid Costly Errors
- Practice on a junk panel before working on your actual truck. Get comfortable handling the vinyl and using your heat gun first.
- Keep a spray bottle of soapy water nearby. Misting the surface helps you reposition the vinyl before it sets.
- Never use your fingers to stretch vinyl — the oils from your skin weaken the adhesive. Always use tools.
- Take photos at each stage so you can compare your progress and spot issues early in the truck wrapping process.
When to Call a Professional Instead
Let us be honest — wrapping your own truck is not for everyone. There are situations where hiring a professional makes much more sense. Knowing when to call in the experts saves you time, money, and frustration in the long run.
Complex Full Vehicle Designs
If you want a custom truck wrap design with intricate graphics, color gradients, or full truck livery patterns, a professional designer and installer is the safer bet. These wraps require precise alignment across multiple panels and often involve custom-printed vinyl that cannot be adjusted easily once applied.
Specialty Finishes
Chrome, satin chrome, color-shift, and brushed metal wraps are notoriously difficult to install. These materials are rigid and do not stretch like standard vinyl. Even experienced DIYers struggle with these finishes. A professional has the specialized tools and techniques needed for specialty wrap material application.
Wrapping Around Complex Curves
Some trucks have aggressive body lines, deep contours, or complex bumper shapes. These areas require advanced stretching techniques that take years to master. If your truck falls into this category, you might save money by attempting easier panels yourself and leaving the difficult sections to pros.
Time Constraints
Let us face it — not everyone has 15+ hours to spend wrapping their truck. If time is limited, a professional wrap installation gets the job done faster and more efficiently. Many shops finish a full truck wrap in just one or two days.
Expert Insight: The Hybrid Approach
Many truck owners use a hybrid strategy. They handle simple, flat panels themselves — like the tailgate or hood — and leave curved or complex areas to the professionals. This approach gives you the best of both worlds: significant cost savings on easy sections and professional quality where it matters most for your truck customization.
Key Takeaways on When to Go Pro
- Choose professional help for full custom designs, specialty finishes, and complex body shapes.
- Consider the hybrid approach — DIY simple panels and hire pros for difficult ones.
- Factor in your time — professional labor costs more but saves you hours of work.
Maintaining Your Truck Wrap for Long-lasting Results
Once you have successfully wrapped your own truck, proper maintenance keeps it looking fresh for years. A well-maintained truck wrap can easily last 5 to 7 years or even longer with good care.
Cleaning Your Wrapped Truck
Wash your wrapped truck the same way you would wash any vehicle. Use a gentle car wash soap and microfiber towels. Avoid abrasive scrubbers or high-pressure washers directly on wrap edges. These can lift the vinyl over time and compromise the entire wrap.
Avoid automatic car washes with rotating brushes. The friction wears down the wrap finish and can cause premature peeling. Hand washing is always the safer route for maintaining your body wrap appearance.
Wax and Protect
You can apply a paste wax or ceramic coating over your vinyl wrap. This adds a protective layer that repels dirt, water, and UV rays. Just make sure the product is safe for vinyl surfaces. Harsh chemicals can degrade the wrap material and dull the finish on your truck graphics.
Dealing with Minor Damage
Small scratches or tears in the wrap can often be repaired at home. Clean the damaged area, apply a small patch of matching vinyl from a spare roll, and smooth it out with your heat gun and squeegee. For larger damage, consult a professional for wrap removal and repair.
Conclusion: Is Wrapping Your Own Truck Worth It?
So, can I wrap my own truck? Absolutely yes. With the right materials, tools, patience, and this guide, you can transform your truck’s look without spending a fortune. The savings alone — often $1,000 to $3,000 or more — make it well worth the effort for most truck owners.
Wrapping your own truck gives you a rewarding hands-on experience. You learn new skills, you customize your ride on your own terms, and you enjoy the pride of showing off a truck wrap you installed yourself. Start small with a partial truck makeover if you are nervous, and build your confidence from there.
Remember to take your time, prepare your surfaces properly, and follow each step carefully. Avoid the common mistakes we covered, and do not be afraid to call in a professional for sections that feel beyond your skill level. Whether you go full DIY or use the hybrid approach, you are going to love the results. Your DIY truck wrap will turn heads, save money, and protect your truck’s original paint — all at the same time.
Frequently Asked Questions
How long does a DIY truck wrap last?
A properly installed truck wrap using quality cast vinyl typically lasts 5 to 7 years. Calibrated vinyl may last 3 to 5 years. Maintenance plays a big role — regular washing and waxing extend the life of your wrap significantly.
Can I wrap my own truck without any experience?
Yes, you can. Many first-time wrappers start with partial wraps or simpler panels to build their skills. Watch tutorial videos, practice on scrap material, and take your time. The DIY truck wrap process is very learnable with patience.
What is the cheapest way to wrap a truck?
The cheapest way is to buy a budget-friendly wrap kit made from calendered vinyl and handle the entire installation yourself. A basic truck wrap material and tool set can cost as little as $500 to $800 total compared to $2,500+ for professional service.
Will a truck wrap damage the original paint?
No. A vinyl wrap is designed to be removable without damaging factory paint. In fact, the wrap protects your original paint from scratches, sun exposure, and minor impacts. When you remove it, your paint should look just as good as before.
Can I wrap just parts of my truck?
Absolutely. Many truck owners choose a partial truck wrap covering just the hood, roof, tailgate, or side panels. Partial wraps cost less and are easier for beginners to tackle. They still give your truck customization a bold, stylish look.
What is the best brand of wrap material for DIY projects?
Popular brands for DIY truck wrapping include 3M, Avery Dennison, and Oracal. These brands offer high-quality cast vinyl that stretches well and lasts for years. They also have good online resources and tutorials to help beginners succeed with their first wrap installation.