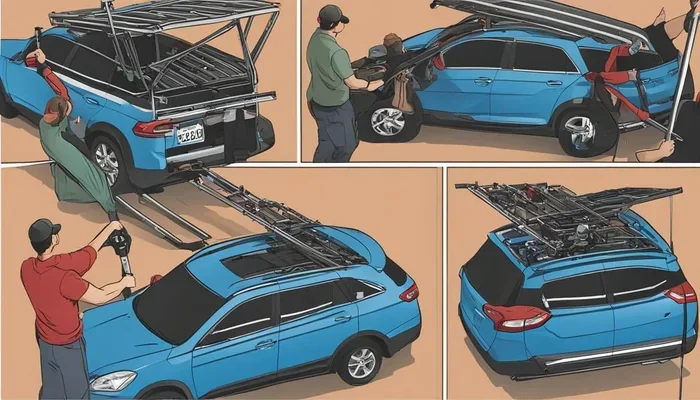
Is It Difficult to Install Roof Racks on Your Vehicle
Installing roof racks is easier than most people think. With the right tools and a basic understanding of your vehicle, most DIYers can complete the job in under an hour. This guide walks you through every step of the process so you can install roof racks confidently and safely on your vehicle.
Have you ever looked at your car roof and wondered whether you could add a roof rack? Maybe you want to carry bikes, luggage, or camping gear on your next adventure. The question on your mind is probably this: is it difficult to install roof racks? The short answer is no. Most roof rack systems are built for easy setup, and you do not need to be a mechanic to get the job done.
Installing roof racks on your vehicle is a straightforward process that many car owners handle themselves. Whether you drive a sedan, SUV, or truck, the basics stay the same. You measure, you mount, and you secure. That is really it. In this guide, we walk you through everything you need to know about roof rack installation, from choosing the right system to avoiding common mistakes.
Roof racks open up a world of possibility for your vehicle. They let you carry gear that simply would not fit inside your car. But before you dive in, it helps to understand the different types of roof rack systems available. Not every car has the same roof, and not every rack fits every car. Knowing your options makes the whole process much smoother.
Key Takeaways
- Easy Process: Most roof rack systems are designed for simple, tool-friendly installation at home.
- Know Your Vehicle: Understanding your car’s roof type — whether it has factory rails, bare roof, or fixed points — is the key to success.
- Right Tools Matter: Having the correct tools ready saves time and prevents frustrating mistakes.
- Follow the Manual: Every roof rack brand includes detailed instructions. Following them step by step ensures a secure fit.
- Safety First: Proper installation protects both your vehicle and your cargo during every trip.
- Common Mistakes Are Avoidable: Over-tightening bolts and ignoring weight limits are the top errors people make.
- Expert Tips Help: Small details like checking crossbar spacing and aerodynamic design make a big difference in performance.
📑 Table of Contents
- What Is a Roof Rack and Why Do You Need One?
- Types of Roof Rack Systems
- Tools and Equipment You Will Need
- Step-by-Step Roof Rack Installation Guide
- Common Mistakes to Avoid During Roof Rack Installation
- Tips for a Smooth Roof Rack Fitting Experience
- Expert Insights on Roof Rack Installation
- How Long Does Roof Rack Installation Usually Take?
- Is Professional Installation Worth It?
- Maintaining Your Roof Rack After Installation
- Conclusion
What Is a Roof Rack and Why Do You Need One?
A roof rack is a set of bars and accessories mounted on top of your vehicle. It creates a platform where you can strap or lock gear safely above your car. People use roof racks for all kinds of things — roof boxes, bike carriers, kayak mounts, and extra luggage.
The main benefit of a roof rack system is extra cargo space. It frees up room inside your car for passengers and keeps your gear secure during long drives. A good aftermarket roof rack also adds minimal drag when designed well, so you do not lose much fuel efficiency.
Who Needs a Roof Rack?
Anyone who regularly carries bulky items outside their vehicle benefits from roof racks. Here are some common use cases:
- Campers and hikers: They need to carry tents, coolers, and gear to remote locations.
- Families: Roof racks help transport strollers, bikes, or extra luggage on road trips.
- Outdoor enthusiasts: Kayaks, surfboards, and mountain bikes all fit perfectly on a roof rack.
- Daily commuters: Even a simple roof rack can carry oversized items that do not fit in the trunk.
Types of Roof Rack Systems
Not all roof racks are the same. The type you choose depends on your vehicle’s roof design. Understanding the different roof rack systems helps you pick the right one and makes installation much easier.
Factory Roof Rails
Many modern vehicles come with factory roof rails already installed. These are raised channels running along the length of the roof. If your car has factory rails, you are in luck. Most roof rack brands offer clip-on systems that attach directly to these rails without any drilling. This is the easiest type of roof rack fitting you can do.
Bare Roof Racks
A bare roof means your car has no rails or fixed points. You will need a roof rack system that uses feet with straps or clamps that wrap around the door frame. Bare roof rack installation takes a little more effort, but it is still very doable. The key is making sure the straps are tight and the feet sit securely.
Fixed Points and Flush Rails
Some vehicles have fixed attachment points built into the roof — small metal or reinforced plastic anchors hidden under trim. Flush rail systems use these points for a low-profile look. They are slightly more complex to install but offer a cleaner aesthetic and better aerodynamic performance.
Crossbar Spacing and Compatibility
Crossbar spacing matters more than most people realize. The distance between the two bars affects how much weight your roof can handle and how stable your cargo stays. Always check the crossbar spacing recommended by your vehicle manufacturer. Wrong spacing can lead to roof rack noise and even damage during driving.
Tools and Equipment You Will Need
One of the best things about DIY roof rack installation is that you do not need a garage full of tools. A basic set of equipment is all it takes. Having everything ready before you start keeps the process smooth and frustration-free.
Essential Tools for Roof Rack Installation
- Socket wrench set: Most mounting bolts use standard sizes. A basic socket set covers them all.
- Tape measure: Accurate measurements ensure your roof rack fits correctly and looks balanced.
- Rubber mallet: Helpful for tapping clips and feet into place without scratching your roof.
- Torque wrench: This ensures you tighten bolts to the right specification without over-tightening.
- Pen and paper: Jot down measurements and notes as you go. It saves time if you need to double-check something.
Recommended Accessories
While not required, a few accessories make roof rack installation easier and more enjoyable:
- Anti-wind fairings: These reduce roof rack noise and improve fuel efficiency at highway speeds.
- Locking mechanisms: They keep your roof rack and cargo secure from theft.
- Rubber padding: Protects your vehicle’s roof from scratches during installation and daily use.
- Load straps and tie-downs: Essential for securing cargo properly on top of the rack.
Step-by-Step Roof Rack Installation Guide
Now comes the fun part. Following these steps carefully ensures your roof rack is installed correctly and safely. Even if you have never done this before, the process is simple and satisfying.
Step 1: Read the Manual Thoroughly
Before you touch a single tool, read the entire instruction manual that comes with your roof rack. Every roof rack brand includes detailed guidance specific to their system. The manual tells you which parts go where and what torque settings to use. Skipping this step is one of the most common mistakes people make.
Step 2: Clean Your Vehicle Roof
Start with a clean surface. Dirt and debris can interfere with how well the rack feet or clamps grip your roof. A quick wash and dry takes just a few minutes but makes a big difference in the final result.
Step 3: Position the Feet or Clamps
Place the rack feet or clamps on your roof in the correct position. Use your tape measure to confirm spacing matches the manufacturer’s recommendations. For factory rail systems, simply slide the clips onto the rails and adjust until they feel snug.
Step 4: Secure the Mounting Hardware
Once the feet are positioned, start threading the mounting bolts. Hand-tighten them first, then use your socket wrench to snug them up. Here is a pro tip: do not fully tighten every bolt until all feet are in place. This lets you make small adjustments for perfect alignment.
Step 5: Attach the Crossbars
With the feet secured, lift the crossbars into position and lock them into the feet. Most modern systems use a simple click-lock mechanism. You should hear a satisfying click when they are properly seated.
Step 6: Check Everything Twice
Give every connection a firm tug. Walk around the vehicle and look at the rack from all angles. Make sure nothing is loose and the rack sits evenly. This final check is what separates a good installation from a great one.
Quick Tips for First-Time Installers
- Work on a flat surface so your vehicle does not rock during installation.
- Have a friend help you hold the crossbars in place while you tighten bolts.
- Use a torque wrench to avoid over-tightening, which can damage your roof or the rack.
- Take photos at each step so you can refer back if something feels off later.
Common Mistakes to Avoid During Roof Rack Installation
Even simple tasks come with pitfalls. Knowing the common mistakes people make during roof rack fitting helps you avoid them and get it right the first time.
Over-Tightening Bolts
This is the number one mistake. Too much force can strip threads, crack plastic clips, or even damage your vehicle’s roof seal. Always follow the torque specifications in your manual. If you do not have a torque wrench, tighten until snug and then give a quarter turn more. That is usually enough.
Ignoring Roof Load Capacity
Every vehicle has a maximum roof load capacity printed in the owner manual. Exceeding this limit is dangerous and can compromise your car’s structural integrity. Before you load up your new rack, find out what your vehicle can handle. This includes the weight of the rack itself plus everything you place on top.
Skipping the Rubber Padding
Some people skip the rubber pads that come with their roof rack to save time. This is a bad idea. The padding protects your car’s paint from scratches and helps absorb vibrations that cause roof rack noise on long drives.
Wrong Crossbar Placement
Placing crossbars too close together or too far apart affects both stability and weight distribution. Always follow the recommended crossbar spacing for your specific vehicle model. Incorrect placement is a leading cause of roof rack wind resistance and rattling during highway driving.
Forgetting to Check Wind Resistance
A poorly installed roof rack increases wind drag significantly. This reduces fuel efficiency and creates annoying wind noise. After installation, take a short test drive and listen carefully. If you hear whistling or rushing air, check that all components are tight and properly aligned.
Tips for a Smooth Roof Rack Fitting Experience
A little preparation goes a long way. These practical tips help make your roof rack installation as smooth as possible, even if you are a complete beginner.
Choose the Right Roof Rack Brand
Not all roof rack brands are created equal. Some focus on ease of installation, while others prioritize aerodynamic design or cargo capacity. Popular brands like Thule, Yakima, and Rhino Rack offer excellent customer support and detailed installation videos on their websites. Picking a reputable brand means better instructions, higher-quality mounting hardware, and a more reliable roof rack warranty.
Watch Video Tutorials Before You Start
Reading a manual is great, but watching someone else do the job first builds confidence. Search for installation videos specific to your roof rack model. Seeing the process in action helps you understand the flow and prepares you for any surprises.
Do a Dry Run Before Tightening
Assemble all the parts without fully tightening anything first. This dry run lets you check that everything fits correctly and that you have all the necessary components. It is a small step that saves a lot of headaches later.
Consider Aerodynamic Roof Rack Design
If you drive frequently at highway speeds, an aerodynamic roof rack design reduces drag and fuel consumption. Many modern roof rack systems come with built-in wind fairings or offer them as add-on accessories. The slight extra cost is worth the fuel savings over time.
Test Your Installation Before a Long Trip
Once installed, do not wait for a big road trip to test your roof rack. Take a short drive around your neighborhood first. Check for any unusual sounds, loose connections, or swaying cargo. Fixing a small issue close to home is much easier than dealing with it on the highway.
Expert Insights on Roof Rack Installation
We spoke with automotive experts about the most common questions they hear regarding roof rack installation. Here is what the professionals want you to know.
According to experienced auto technicians, the biggest factor in successful roof rack fitting is understanding your vehicle’s roof type. Once you know whether you have factory rails, a bare roof, or fixed points, the rest of the process follows naturally. Experts also emphasize that patience pays off. Rushing through installation is how accidents happen — both to the rack and to your vehicle’s finish.
Another expert tip relates to roof rack height clearance. Make sure your loaded rack does not exceed the recommended height for your vehicle. A rack that is too tall affects your center of gravity and can make your vehicle feel unstable during turns. This is especially important for taller cargo like roof boxes and kayaks.
Finally, professionals recommend inspecting your roof rack regularly. Over time, vibrations from driving can loosen bolts and fittings. A quick check before every long trip keeps everything secure and extends the life of your roof rack system.
How Long Does Roof Rack Installation Usually Take?
For most vehicles, you can complete the entire roof rack installation in 30 to 60 minutes. Factory rail systems tend to be the fastest, often taking 20 minutes or less. Bare roof systems and flush rail setups may take closer to an hour because they require more careful positioning and strap adjustment.
The key factors that affect installation time include your experience level, the complexity of the rack system, and how many accessories you are attaching. If it is your first time, give yourself a little extra buffer. You will get faster with practice, and the satisfaction of doing it yourself is well worth the effort.
Is Professional Installation Worth It?
Some car owners prefer to have a professional handle the roof rack fitting. This is a perfectly valid choice, especially if you are unsure about your vehicle’s roof type or if you have a complex flush rail system. Professional installation typically costs between $50 and $150 depending on your location and the rack system.
However, for most standard roof rack installations, DIY is the better option. It saves money, gives you a deeper understanding of your vehicle, and lets you customize the setup exactly how you want it. The mounting hardware that comes with most aftermarket roof rack systems is designed for easy home installation, so you really do not need special skills.
Maintaining Your Roof Rack After Installation
Once your roof rack is installed, keeping it in good shape is simple. Here are a few maintenance tips that extend the life of your system:
- Clean the rack regularly: Road salt, dirt, and debris can cause corrosion on metal parts. A quick rinse after off-road trips or winter drives goes a long way.
- Lubricate moving parts: If your rack has locking mechanisms or adjustable feet, apply a light silicone lubricant every few months.
- Check bolt tightness: Give all bolts a quick check before every major trip. A loose bolt today can become a safety issue tomorrow.
- Store accessories properly: When not in use, remove crossbars and store them indoors to prevent sun damage and extend their lifespan.
- Review your roof rack warranty: Most reputable brands offer multi-year warranties. Keep your receipt and register your product to stay covered.
Taking care of your roof rack ensures it performs safely and reliably every time you hit the road. A well-maintained rack also looks better and adds resale value to your vehicle.
Conclusion
So, is it difficult to install roof racks? The answer is a clear no. With the right roof rack system for your vehicle, a basic set of tools, and this guide to walk you through the process, you can have your roof rack installed and ready to go in under an hour. The key is understanding your vehicle’s roof type, following the manufacturer’s instructions, and taking your time with each step.
Whether you choose a factory rail system, a bare roof rack, or a flush rail setup, the installation process is designed to be manageable for anyone. Avoid common mistakes like over-tightening bolts and ignoring weight limits, and you will have a secure, reliable roof rack that serves you well for years to come.
Now that you know how straightforward roof rack installation really is, there is no reason to wait. Pick the right system for your vehicle, gather your tools, and get started today. Your next adventure is waiting, and your roof rack will be there to carry everything you need.
Frequently Asked Questions
Do I need any special tools to install roof racks?
No special tools are required for most roof rack installations. A basic socket wrench set, a tape measure, and a rubber mallet are usually all you need. Some manufacturers recommend a torque wrench for the final tightening, but it is not mandatory. If you have a standard home tool kit, you are already prepared to get the job done.
Can I install a roof rack on any vehicle?
Yes, you can install a roof rack on virtually any vehicle. The type of rack you need depends on your car’s roof design. Vehicles with factory roof rails use clip-on systems, while bare roof cars need strap-based or clamp-based racks. Flush rail systems work for cars with fixed attachment points. The key is choosing a roof rack system that matches your specific vehicle model.
How much weight can a typical roof rack hold?
Roof load capacity varies by vehicle and rack system. Most modern vehicles can handle between 75 and 165 pounds on the roof, including the weight of the rack itself. Always check your vehicle owner manual for the exact roof load capacity. Exceeding this limit can affect handling, braking, and structural safety.
Will a roof rack increase wind noise on my car?
A properly installed roof rack should not create significant wind noise. However, poorly fitted racks, wrong crossbar spacing, or missing wind fairings can cause whistling and rattling at highway speeds. Using aerodynamic crossbars, adding wind fairings, and ensuring all components are tight will minimize any roof rack noise during driving.
How long does a roof rack installation usually take?
Most roof rack installations take between 30 and 60 minutes. Factory rail systems are the fastest and can be done in under 20 minutes. Bare roof systems and flush rail setups may take closer to an hour due to additional positioning and adjustment steps. Your experience level also plays a role — first-timers may want to allow extra time.
Is it safe to drive long distances with a loaded roof rack?
Yes, it is safe as long as the roof rack is installed correctly and the load does not exceed your vehicle’s roof weight capacity. Make sure all cargo is tightly secured with straps and tie-downs. Check your mirrors to ensure nothing is sticking out too far, and drive at moderate speeds until you are confident the load is stable. Regularly inspect bolts and connections before long trips.