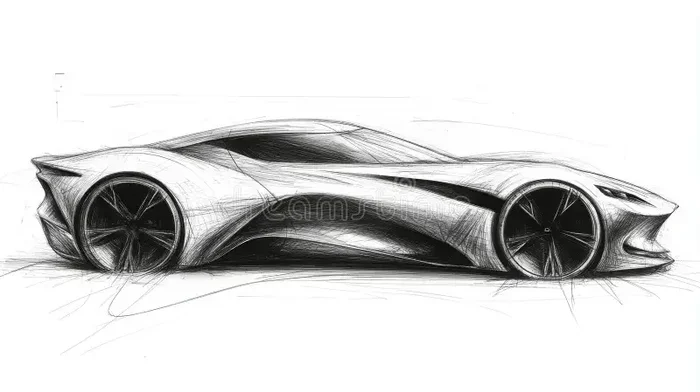
Car Drawing in Black and White Simple Step by Step Guide
Car drawing black and white is one of the best ways to build your sketching skills from the ground up. This guide walks you through every step, from basic shapes to detailed shading, so anyone can learn. You will discover easy techniques, common mistakes to avoid, and pro tips that make your drawings look professional. Whether you are a total beginner or someone looking to sharpen your skills, this guide has you covered. By the end, you will feel confident enough to draw any car in black and white.
There is something timeless about a car drawing black and white. Strip away the color and you are left with pure form, light, and shadow. It is just you and the pencil on paper, bringing a vehicle to life through simple lines and careful shading.
Whether you are a complete beginner picking up a pencil for the first time or an experienced artist looking to refine your skills, learning how to draw a car in black and white is a rewarding journey. This guide breaks everything down into easy, manageable steps. You will not need fancy tools or expensive software. All you need is a pencil, an eraser, and the willingness to practice.
By the end of this article, you will understand the core techniques behind car sketch tutorial methods. You will know how to build a car from basic shapes, add realistic shading, and avoid the mistakes that trip up most beginners. Let us get started.
Key Takeaways
- Start with Basic Shapes: Every car drawing begins with simple geometric forms like rectangles and circles.
- Shading Makes It Real: Learning how to add shadows and highlights transforms a flat sketch into a realistic car drawing.
- Practice Proportions: Getting the proportions right is the single biggest factor in making your car drawing look accurate.
- Use the Right Tools: A simple pencil and eraser are all you need to start, but a few extra tools can level up your work.
- Avoid Common Mistakes: Rushing the process and skipping guidelines are the top errors beginners make.
- Black and White Builds Strong Foundations: Working in monochrome helps you focus on form, light, and shadow without the distraction of color.
📑 Table of Contents
- Why Car Drawing in Black and White Is the Best Starting Point
- Step-by-Step Guide to Drawing a Car in Black and White
- Essential Car Drawing Techniques to Master
- Common Mistakes to Avoid When Drawing Cars
- Easy Car Drawing Ideas for Practice
- Comparison: Pencil vs. Pen for Car Drawing
- Expert Tips to Improve Your Car Drawings Faster
- Conclusion
Why Car Drawing in Black and White Is the Best Starting Point
Many people jump straight into color when they start drawing cars. But working in black and white sketch style has huge advantages. Without color, you cannot hide behind bright hues. You have to focus on the fundamentals. And those fundamentals are what make every great drawing strong.
When you work in monochrome, you are forced to understand how light hits a surface. You learn where shadows fall and how to create depth. These skills transfer directly to every other type of drawing you will ever do. A pencil drawing of car in black and white teaches you more about form than a hundred colored sketches ever could.
Here are a few reasons why starting with black and white is the smart move:
- It simplifies the process. You only have to worry about shapes, lines, and tones.
- It builds strong observation skills. You learn to really see how light and dark work on a car’s surface.
- It requires minimal supplies. Just a pencil and paper are enough to get started.
- It boosts your confidence. Mastering a black and white drawing gives you a solid foundation for more complex work.
What You Need Before You Start
One of the great things about car drawing for beginners is that you do not need a lot of supplies. Here is a simple list of what to have ready:
- A standard graphite pencil (HB or 2B works great)
- A kneaded eraser for lifting graphite and creating highlights
- A regular eraser for corrections
- A smooth drawing paper or sketchbook
- A blending stump or cotton swab for smooth shading
- A reference photo of a car (optional but helpful)
You do not need expensive artist-grade materials to start. A basic pencil set from any dollar store will get you surprisingly far. The real magic comes from your technique and practice.
Step-by-Step Guide to Drawing a Car in Black and White
Now let us get into the fun part. This step by step car drawing guide will walk you through the entire process. Follow along slowly, and do not worry about making mistakes. Every artist starts somewhere.
Step 1: Start with Basic Shapes
Every realistic car drawing begins with simple shapes. Look at any car and you will see rectangles, ovals, and circles hiding underneath the body. Start by lightly sketching a large rectangle for the main body. Add a smaller rectangle on top for the cabin. Draw two circles for the wheels and smaller circles inside them for the hubs.
Keep your lines light at this stage. You are just building a framework. Think of it like a skeleton that your final drawing will hang on. Use light pressure so you can erase these guidelines later without leaving marks.
Step 2: Refine the Outline
Once you have your basic shapes in place, start refining the outline. Smooth out the lines and add curves where needed. Pay close attention to the car’s profile. Notice how the hood slopes, how the roof curves, and where the trunk tapers off.
This is where your drawing starts to look like a real car. Take your time with this step. A clean, confident outline makes everything that follows much easier. If you are drawing a sports car drawing, pay extra attention to the low, sleek lines. For a classic car drawing, focus on the rounded fenders and chrome details.
Step 3: Add Key Details
Now it is time to bring your car to life with details. Add the windows, doors, headlights, and bumper. Draw the door handles and any visible seams or panel lines. These small details are what separate a stick-figure car from a convincing automotive drawing.
Do not go overboard here. Focus on the most visible and important details first. You can always add more later. A few well-placed lines tell the viewer far more than a dozen messy ones.
Step 4: Begin Shading
This is where the black and white art really comes alive. Start shading the areas that would be in shadow. On a car, this is typically under the hood, beneath the roof, the lower body panels, and the areas near the wheel wells.
Use the side of your pencil for broader shading. Build up the tone gradually in light layers. Rushing this step is a common mistake. Patience here pays off big time. The more layers you build, the richer your pencil sketch car will look.
Step 5: Blend and Refine
Take your blending stump or a cotton swab and gently smooth out your shading. This creates a seamless gradient from dark to light. You can also use your finger, but a blending tool gives you more control.
After blending, go back in with your pencil to deepen the darkest shadows. This contrast between light and dark is what creates the illusion of three dimensions. Your car drawing black and white should now start looking genuinely three-dimensional on a flat piece of paper.
Step 6: Add Highlights and Final Touches
Use your kneaded eraser to lift graphite and create highlights. Press the eraser into the paper gently and lift to reveal the white underneath. This works beautifully for reflections on the hood, the top of the roof, and the chrome trim on the bumper.
Step back and look at your drawing from a distance. Does it look balanced? Are the shadows consistent? Make any final adjustments now. A few well-placed highlights can make the difference between a flat sketch and a stunning car outline drawing.
Essential Car Drawing Techniques to Master
Beyond the basic steps, there are specific techniques that will level up your car drawing techniques dramatically. These are the skills that experienced artists use every day.
Understanding Light and Shadow
Light is the secret ingredient in every great drawing. Decide where your light source is coming from before you start shading. Everything on the side facing the light stays lighter. Everything on the opposite side falls into shadow. This simple rule creates depth and realism in any car perspective drawing.
Try this exercise: draw a simple car shape and place a light source on the left. Shade everything on the right side. You will immediately see how much more three-dimensional the drawing looks.
Mastering Proportions
Proportions are the backbone of any good drawing. A car that is too long, too short, or too tall will look wrong no matter how good your shading is. When you are learning how to draw cars step by step, always check your proportions against your reference photo.
A good trick is to use the “squinting” method. Squint at your reference photo and at your drawing. This blurs the details and lets you see the big shapes and proportions more clearly. It is a favorite trick among professional artists.
Creating Texture and Surface Details
Different car surfaces look different. Chrome reflects light sharply. Matte paint absorbs it. Glass is transparent and reflective. Learning to draw these different textures takes practice but makes a huge difference in the final result.
For chrome, use sharp highlights with very little surrounding shadow. For matte paint, use soft, even shading. For glass, draw subtle reflections and keep the shading light. These small details add realism to any car drawing ideas you try.
Common Mistakes to Avoid When Drawing Cars
Even the best artists make mistakes. But knowing what to watch out for can save you hours of frustration. Here are the most common errors in car drawing black and white work:
- Skipping the guidelines. Many beginners jump straight to outlines without building basic shapes first. This almost always leads to uneven proportions and a drawing that looks off.
- Pressing too hard. Heavy pencil marks are hard to erase and can damage the paper surface. Keep your initial lines light and gentle.
- Shading too dark too fast. It is easy to go too dark too quickly. Build up your shading gradually. You can always add more, but you cannot easily take it away.
- Ignoring the wheels. Wheels are the foundation of any car drawing. If they are off, the whole drawing looks wrong. Spend extra time getting the wheels right.
- Forgetting about reflections. Cars have smooth surfaces that reflect light. Without highlights, a car drawing can look flat and lifeless.
- Rushing the process. Drawing takes time. Patience is not just a virtue in art, it is a necessity. Take breaks and come back with fresh eyes.
Easy Car Drawing Ideas for Practice
The best way to improve your car drawing easy skills is to practice regularly. Here are some great subjects to try as you build your confidence:
- Side profile of a sedan. This is the simplest and most forgiving car shape to start with.
- A classic car from the front. The symmetrical front of a classic car is great for practicing proportion.
- A sports car in three-quarter view. This angle teaches you about perspective and foreshortening.
- A vintage truck from the side. Trucks have simpler shapes and are excellent for practicing shading on flat surfaces.
- A race car in motion. Adding motion lines challenges you to capture speed and energy in a still drawing.
Pick one subject and draw it multiple times. Each attempt will be better than the last. Progress in drawing is not linear, but it is always happening if you keep practicing.
Comparison: Pencil vs. Pen for Car Drawing
Both pencil and pen have their place in car sketch tutorial work. Here is a quick comparison to help you choose:
| Feature | Pencil | Pen |
|---|---|---|
| Erasability | Easy to erase and fix mistakes | Cannot erase, permanent marks |
| Shading Range | Wide range from light to dark | Limited to ink tone and line density |
| Control | Very forgiving for beginners | Requires more confidence and precision |
| Best For | Learning, practice, and shading | Bold outlines, final pieces, and line art |
| Cost | Very affordable | Affordable, but no room for error |
For beginners, pencil is the clear winner. It lets you experiment without fear. Once you are comfortable, try switching to pen for a bold, clean look. Many artists use pencil first and then trace over their favorite lines with pen for a finished piece.
Expert Tips to Improve Your Car Drawings Faster
Want to level up your draw cars step by step skills quickly? Here are some pro tips that make a real difference:
- Draw every day. Even 15 minutes a day builds skill faster than a long session once a week. Consistency is the key to improvement.
- Use reference photos. There is no shame in drawing from a photo. Professional artists do it all the time. It helps you understand real shapes and details.
- Focus on one skill at a time. One day practice shading. Another day practice proportions. Trying to fix everything at once is overwhelming.
- Flip your drawing upside down. This tricks your brain into seeing shapes instead of symbols. It is a surprisingly effective way to improve accuracy.
- Record your progress. Keep your old drawings. Looking back after a month or two shows you how far you have come and keeps you motivated.
- Join a drawing community. Sharing your work and getting feedback from other artists accelerates your growth in ways that practicing alone cannot.
Conclusion
Car drawing black and white is one of the most rewarding skills you can develop. It teaches you the fundamentals of form, light, and shadow in a way that is simple and satisfying. You do not need expensive supplies or years of experience to get started. All you need is a pencil, some paper, and the willingness to practice.
This guide has walked you through every step, from basic shapes to final highlights. You now know the core techniques, common mistakes to avoid, and exercises to build your skills faster. The key is to be patient with yourself and enjoy the process. Every line you draw brings you closer to creating stunning black and white sketch artwork of your favorite cars.
Pick up your pencil today. Start with the basic shapes. Follow the steps in this guide. And most importantly, have fun with it. The world of car drawing is waiting for you, and there is no better time to start than right now.
Frequently Asked Questions
What is the easiest car to draw for beginners?
A simple sedan in side profile is the easiest car to start with. Its basic shape is made of rectangles and curves, which are very forgiving for beginners. Once you master the sedan, you can move on to more complex shapes like sports cars or trucks.
Do I need special pencils to draw cars in black and white?
No, you do not need special pencils. A standard HB or 2B graphite pencil works perfectly for starting out. If you want to get more serious later, a set of graphite pencils with different hardness levels (like 2H, HB, 2B, and 6B) gives you more tonal range. But for your first few drawings, any pencil will do just fine.
How long does it take to learn car drawing?
Everyone learns at a different pace, but most beginners see noticeable improvement within a few weeks of regular practice. Drawing for just 15 to 20 minutes a day can make a big difference. The more consistently you practice, the faster your car sketch tutorial skills will develop.
Can I use a reference photo when drawing a car?
Absolutely. Using a reference photo is one of the best things you can do as a beginner. It helps you understand the real proportions, angles, and details of a car. Many professional artists use reference photos for every drawing they create. There is no shortcut to learning without references.
What is the best paper for car drawing?
A smooth, medium-weight drawing paper works best for pencil car drawings. Smooth paper allows for easy blending and shading without the pencil catching on the texture. A standard sketchbook with 60 to 80 lb paper is a great starting point. You do not need expensive paper to practice and improve.
How do I make my car drawing look more realistic?
Focus on three things: accurate proportions, smooth shading, and sharp highlights. Get the basic shapes right first. Then build up your shadows gradually using light pencil layers. Finally, use an eraser to lift highlights on reflective surfaces like the hood and windows. These three elements together create a realistic car drawing that looks three-dimensional and professional.