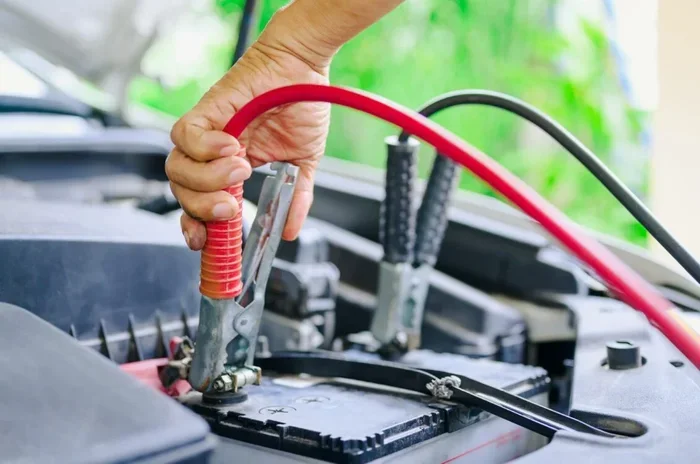
Where to Plug in Jumper Cables for a Quick Jump Start
Knowing where to plug in jumper cables can save you from a frustrating roadside breakdown. This guide walks you through the exact battery terminals, the correct clamp order, and essential safety steps to jump start your car quickly and safely. Whether you are a beginner or just need a refresher, you will find clear, practical instructions that work for almost every vehicle.
There is nothing quite like the sinking feeling when you turn your car key and hear nothing but a click. Your battery is dead, and you need a jump start fast. But before you grab those jumper cables, do you actually know where to plug in jumper cables? It sounds simple, but getting the connections wrong can damage your electrical system or even cause a dangerous spark. This guide will walk you through every single step so you can jump start your vehicle confidently and safely.
Whether you are stranded in a parking lot or preparing for a roadside emergency, understanding your car battery terminals and the correct cable order makes all the difference. We will cover everything from the basics of battery posts to expert safety tips that most guides skip. By the end of this article, you will never second-guess yourself again when it is time to boost a dead battery.
Key Takeaways
- Red goes to positive, black goes to negative: Always connect the red clamp to the positive battery terminal first.
- Ground the black clamp on metal: If the negative terminal is hard to reach, attach it to an unpainted metal surface on the engine block.
- Follow the correct order: Connect the dead battery first, then the working battery, and disconnect in the reverse order.
- Avoid common mistakes: Never let clamps touch each other, and always check for corrosion before connecting.
- Safety comes first: Wear gloves, keep sparks away from the battery, and read your vehicle manual for specific guidance.
- Know when to call for help: If the jump start fails after a few tries, seek professional assistance rather than forcing it.
📑 Table of Contents
- Understanding Your Car Battery Terminals
- Step-by-Step: Where to Plug in Jumper Cables
- Common Mistakes When Plugging in Jumper Cables
- Safety Tips for Jump Starting Your Vehicle
- What to Do If the Jump Start Does Not Work
- Preventing a Dead Battery in the Future
- Expert Insights on Jump Starting Safely
- Key Takeaways
- Conclusion
Understanding Your Car Battery Terminals
Before you touch a single cable, you need to know what you are looking at. Every car battery has two terminals, and they are easy to identify once you know the signs. The positive terminal is marked with a plus sign or sometimes a red cover. The negative terminal has a minus sign or a black cover. These markings exist for a reason, and they are your best friend when connecting jumper cables.
Locating the Battery Posts
Pop your hood and look for the battery. It is usually a rectangular box near the front of the engine bay. On top of the battery, you will see two posts sticking up. One will have a red cover or a plus symbol, and the other will have a black cover or a minus symbol. If the covers are worn off, look for the labels molded into the battery case. They are always there.
Sometimes the battery terminals get covered in a white or greenish crust. This is called battery corrosion, and it can block the connection. Before you attach any cables, take a minute to clean the terminals with a wire brush or a battery cleaning tool. A clean connection ensures the electrical current flows properly and gives you a much better chance of a successful jump start.
The Role of Positive and Negative Cables
Jumper cables come with two clamps on each end. The red clamp is always positive, and the black clamp is always negative. The red cable connects to the positive battery post, and the black cable connects to the negative post or a ground point. Remembering this simple color code will prevent most connection errors. Never mix up the clamps, and never let the red and black clamps touch each other once they are attached to a battery.
Step-by-Step: Where to Plug in Jumper Cables
Now for the part you have been waiting for. Here is the exact sequence for connecting jumper cables safely. Follow these steps in order, and you will have your car running again in no time.
Step 1: Park Both Vehicles Safely
Pull the working vehicle close to the car with the dead battery. Make sure both cars are turned off, in park (or neutral for manual transmissions), and the parking brakes are engaged. You do not want either vehicle rolling while you are working under the hood.
Step 2: Identify the Terminals on Both Batteries
Open the hood of both vehicles. Locate the positive and negative terminals on each battery. The dead battery needs the jump, and the working battery provides the boost. Make sure you can clearly see both terminals on each car before moving to the next step.
Step 3: Connect the Red Clamp to the Dead Battery
Take the red jumper cable and attach one clamp to the positive terminal of the dead battery. Tighten it snugly so it does not wiggle. This is the first connection you make, and it sets the tone for the entire process.
Step 4: Connect the Other Red Clamp to the Working Battery
Now take the other end of the red cable and attach it to the positive terminal of the working battery. Again, make sure the clamp is secure. At this point, the red cable is bridging both batteries through the positive posts.
Step 5: Connect the Black Clamp to the Working Battery
Pick up the black cable and attach one clamp to the negative terminal of the working battery. This completes the circuit on one side. Keep the black clamp away from the red clamps at all times.
Step 6: Connect the Final Black Clamp to a Ground Point
Here is a step many people get wrong. Instead of attaching the last black clamp directly to the dead battery’s negative terminal, clamp it to an unpainted metal surface on the engine block of the dead car. This is called grounding, and it reduces the risk of sparking near the battery. Batteries can release flammable gases, so keeping the last connection away from the battery is a smart safety move.
Step 7: Start the Working Vehicle First
Start the engine of the working vehicle and let it run for a minute or two. This allows the alternator to send a charge through the cables to the dead battery. After a couple of minutes, try starting the car with the dead battery.
Step 8: Disconnect the Cables in Reverse Order
Once the dead car starts, remove the cables in the opposite order you attached them. Start with the black clamp from the ground point, then the black clamp from the working battery, then the red clamp from the working battery, and finally the red clamp from the dead battery. This reverse order prevents electrical shorts.
Common Mistakes When Plugging in Jumper Cables
Even with the best intentions, people make mistakes when jump starting a car. Knowing what to avoid can save you time, money, and a lot of frustration.
Mixing Up the Cable Colors
The most common error is connecting the red clamp to the negative terminal or the black clamp to the positive terminal. This reverses the electrical polarity and can fry your car’s electronics, fuse box, or even the alternator. Always double-check that red goes to positive and black goes to negative or ground.
Letting Clamps Touch Each Other
When the red and black clamps are connected to one battery and the other end is still dangling, they must not touch. A spark will jump between them, which can ignite battery fumes. Keep the clamps separated and hold them by the insulated handles at all times.
Skipping the Ground Connection
Some people attach the last black clamp directly to the dead battery’s negative post. While this works in many cases, it increases the risk of a spark near the battery. Always use a grounded metal surface on the engine block when possible. This is one of the most overlooked safety tips in the jump starting process.
Not Letting the Working Car Run Long Enough
After connecting everything, some drivers immediately try to start the dead car without waiting. Give the working car a minute or two to charge the dead battery. This extra patience can be the difference between a successful jump and a second failed attempt.
Ignoring Corroded or Damaged Cables
Frayed cables or corroded clamps reduce the electrical current and make jump starting unreliable. Inspect your jumper cables before you need them. Replace any set that shows signs of wear, cracking, or rust on the clamps. Good quality cables are a small investment that pays off every time you need them.
Safety Tips for Jump Starting Your Vehicle
Jump starting a car involves working with electricity and flammable materials. A few safety precautions go a long way in protecting you and your vehicle.
Wear Protective Gear
Put on safety glasses and insulated gloves before you start. Battery acid can splash, and sparks are always a possibility when working near a car battery. A pair of rubber gloves and a simple pair of safety glasses cost almost nothing and add a huge layer of protection.
Read Your Vehicle Manual
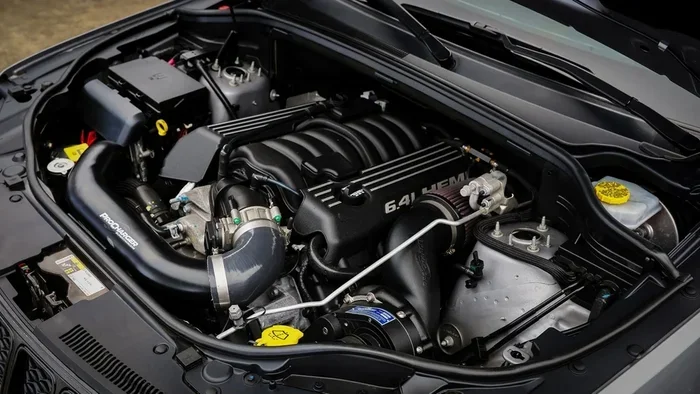
Not all cars are the same. Some vehicles have specific jump start procedures or dedicated jump start terminals under the hood. Your vehicle manual will tell you exactly where to plug in jumper cables for your specific make and model. Taking two minutes to read the manual can prevent costly damage.
Keep Flames and Cigarettes Away
Batteries produce hydrogen gas, which is highly flammable. Never smoke or create sparks near a battery. This includes using a phone lighter or any open flame. Keep the area clear and safe before you begin the jump start process.
Check the Battery for Cracks or Leaks
Before you connect anything, inspect the dead battery. If you see cracks, bulging, or leaking fluid, do not attempt a jump start. A damaged battery can explode. In this case, call for roadside assistance or replace the battery entirely.
Turn Off All Electronics in Both Cars
Before you start the jump process, turn off the headlights, radio, air conditioning, and any other electrical accessories in both vehicles. This reduces the electrical load and helps the jump start succeed faster.
Know Your Portable Jump Starter Options
If you do not have another vehicle nearby, a portable jump starter pack is a fantastic alternative. These small devices fit in your trunk and provide enough power to boost a dead battery without another car. They are especially useful for people who drive infrequently or live in cold climates where batteries drain faster.
What to Do If the Jump Start Does Not Work
You have followed all the steps, but the car still will not start. What now? Do not panic, and do not keep trying over and over. Here are a few things to check.
Wait a Little Longer
Sometimes the dead battery just needs more time to charge. Let the working car run for five to ten minutes before trying again. A deeply discharged battery may require extra charging time before it has enough power to turn the engine over.
Check for Loose Connections
Go back and make sure every clamp is firmly attached. A loose connection will not transfer enough current to start the car. Wiggle each clamp gently to confirm it is secure on the terminal or ground point.
Consider a Dead Alternator
If your battery keeps dying even after a successful jump start, the alternator may be failing. The alternator charges the battery while you drive, and a bad alternator will drain the battery again shortly after the jump. Listen for warning signs like dimming headlights or a dashboard battery light.
Call for Professional Help
If two or three attempts fail, it is time to call a tow truck or roadside assistance. Forcing the jump start process can cause damage to both vehicles. A professional mechanic can diagnose the real issue and get you back on the road safely.
Preventing a Dead Battery in the Future
The best way to deal with a dead battery is to avoid one in the first place. A little maintenance goes a long way toward keeping your battery healthy and your car starting reliably every time.
Drive Your Car Regularly
Car batteries charge while you drive. If you only take short trips or leave your car parked for days at a time, the battery may not fully recharge. Try to drive your vehicle for at least 20 to 30 minutes at a time to keep the battery topped up.
Keep the Battery Clean
Regularly check the battery terminals for corrosion. A quick wipe with a baking soda and water solution can prevent buildup that weakens the connection. Clean terminals mean better electrical flow and a longer battery life.
Turn Off Accessories Before Shutting Down
Make it a habit to turn off headlights, interior lights, and the radio before you switch off the engine. Leaving these on while the car is parked slowly drains the battery over time.
Replace Old Batteries Promptly
Most car batteries last between three and five years. If your battery is older than that, have it tested at an auto parts store. Many stores offer free battery testing and will help you pick a replacement if needed. Replacing an aging battery before it dies completely saves you from unexpected breakdowns.
Invest in Quality Jumper Cables
Not all jumper cables are created equal. Thick-gauge cables with heavy-duty clamps transfer power more efficiently and last much longer. Look for cables rated for at least 400 to 600 amps, which handle most passenger vehicles with ease. Store them in a cool, dry place so the insulation stays flexible and the clamps stay rust-free.
Expert Insights on Jump Starting Safely
Experienced mechanics and automotive experts agree on a few principles that make the jump start process safer and more effective. First, always read the vehicle manual before attempting a jump start on a newer or hybrid vehicle. Some modern cars have sensitive electronics that can be damaged by improper jump starting procedures.
Second, never attempt to jump start a frozen battery. If the temperature has been well below freezing and your battery is dead, the battery fluid may be frozen. Attempting a jump start on a frozen battery can cause it to rupture or explode. Let the battery thaw naturally in a warm garage before trying again.
Third, consider keeping a portable jump starter in your trunk. These compact devices are lightweight, easy to use, and do not require another vehicle. They are especially valuable during winter months when dead batteries are most common. A jump starter pack is one of the best investments you can make for roadside preparedness.
Finally, if you are ever unsure about the process, do not hesitate to ask for help. A friendly passerby, a roadside assistance service, or even a quick call to a trusted mechanic can save you from making a costly mistake. There is no shame in asking for guidance when it comes to working with car batteries and electrical systems.
Key Takeaways
- Know your terminals: The positive terminal is marked with a plus sign and usually has a red cover. The negative terminal has a minus sign and a black cover.
- Follow the connection order: Red to dead positive, red to working positive, black to working negative, black to ground on the dead car. Disconnect in reverse.
- Never let clamps touch: Keep the red and black clamps separated at all times to prevent dangerous sparks.
- Ground the last black clamp: Attach it to unpainted metal on the engine block instead of the negative battery terminal for maximum safety.
- Inspect your cables regularly: Clean terminals, check for fraying, and replace damaged cables before they fail when you need them most.
- Drive regularly to maintain charge: A battery that sits too long will lose its charge. Regular driving keeps the alternator doing its job.
- When in doubt, call a professional: A failed jump start attempt can signal a deeper issue. Trust your mechanic to diagnose the real problem.
Conclusion
Knowing exactly where to plug in jumper cables is one of the most valuable skills every driver should have. It is simple, fast, and can turn a stressful situation into a minor inconvenience. By understanding your battery terminals, following the correct cable order, and practicing basic safety habits, you can jump start your car with confidence every single time.
Remember the golden rule: red to positive, black to negative or ground. Take your time, double-check every connection, and never rush the process. A little patience goes a long way in protecting both you and your vehicle.
Keep a good set of jumper cables in your trunk, invest in a portable jump starter for extra peace of mind, and maintain your battery with regular inspections. These small steps mean you will almost never be caught off guard by a dead battery again. The next time someone asks you where to plug in jumper cables, you will be the person they turn to for help.
Stay prepared, stay safe, and keep your engine running. You have got this.
Frequently Asked Questions
Can I plug jumper cables into the wrong terminals?
No, you should never connect the red clamp to the negative terminal or the black clamp to the positive terminal. Doing so reverses the electrical polarity and can damage your car’s alternator, fuse box, and electronic systems. Always double-check that red goes to positive and black goes to negative or ground.
How long should I let the working car run before trying to start the dead car?
Let the working car run for about two to three minutes before attempting to start the dead vehicle. This gives the alternator time to send a charge through the cables and into the dead battery. If the battery is very low, waiting five to ten minutes may help.
What happens if the red and black clamps touch each other?
If the clamps touch while connected to a battery, a spark will jump between them. This can ignite hydrogen gas around the battery, which is extremely dangerous. Always keep the clamps separated and handle them by the insulated grips.
Do I need to turn off both cars before connecting jumper cables?
Yes, both vehicles must be turned off during the connection process. Starting the working car first and then connecting cables can cause voltage spikes that damage sensitive electronics in either vehicle. Always connect cables with both engines off, then start the working car before attempting to start the dead one.
Can I use jumper cables on a hybrid or electric vehicle?
Some hybrids and electric vehicles have specific jump start procedures or dedicated terminals. Always consult the vehicle manual before attempting a jump start on a hybrid or EV. Improper connection can damage the high-voltage electrical system, which is much more sensitive than a standard car battery.
What is the best way to store jumper cables?
Store jumper cables in a cool, dry place away from direct sunlight. Coil them neatly and keep them in the trunk or a storage compartment. Check the cables periodically for fraying, cracked insulation, or rust on the clamps. Replace any set that shows signs of wear to ensure they work when you need them most.
=== CONCLUSION ===
Jump starting a car does not have to be scary or complicated. Once you understand where to plug in jumper cables and why the order matters, the process becomes second nature. The key points are simple: identify the positive and negative terminals, connect the red clamps first, ground the final black clamp safely, and disconnect everything in reverse order.
By following the steps in this guide, you will handle a dead battery with confidence and keep yourself safe on the road. Share this article with a friend who might need it, and always keep a reliable set of jumper cables in your vehicle. Being prepared is the best way to turn a potential roadside nightmare into a quick five-minute fix.