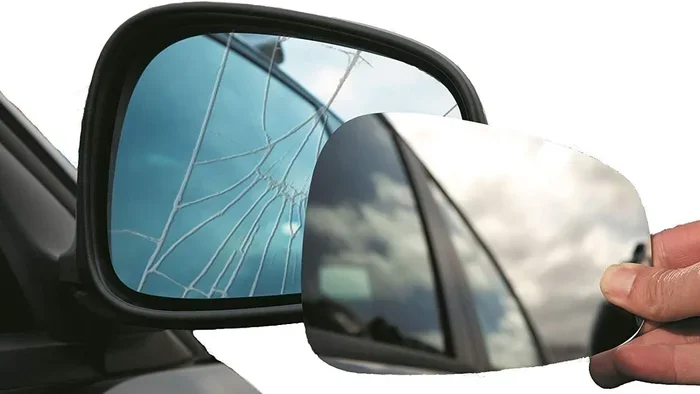
Car Side Mirror Glass Replacement Guide Made Simple
Our Car Side Mirror Glass Replacement Guide Made Simple walks you through every step of swapping out a cracked or damaged mirror glass. You will learn the tools you need, the cost involved, and how to do it yourself safely. Replacing side mirror glass is easier than most drivers think, and this guide makes it even simpler.
Driving with a cracked or shattered side mirror glass is more than just an eyesore. It blocks your view and puts you at risk every time you hit the road. Many drivers delay fixing it because they assume the repair will cost a fortune. The truth is that replacing side mirror glass is one of the simplest car maintenance tasks you can handle yourself.
This Car Side Mirror Glass Replacement Guide Made Simple breaks down the entire process into easy-to-follow steps. Whether your mirror got hit by a ball, cracked in a storm, or just wore out over time, you will find everything you need here. We cover the tools, the costs, the common mistakes, and plenty of practical tips to make the job smooth.
You do not need to be a mechanic to replace your side mirror glass. With the right guidance and a little patience, most drivers can finish the job in under an hour. Let us get started.
Key Takeaways
- DIY replacement saves hundreds: Replacing your side mirror glass at home costs a fraction of what a shop charges.
- Basic tools are all you need: You do not need special equipment to get the job done right.
- Safety comes first: Always disconnect the battery and handle glass carefully to prevent injury.
- Matching the right glass matters: Getting the correct mirror glass for your car model ensures a perfect fit.
- Adhesive quality is critical: Using the right adhesive keeps your new mirror glass secure on the road.
- Timing and weather affect results: Install your mirror glass in warm, dry conditions for the best bond.
📑 Table of Contents
- Why Side Mirror Glass Gets Damaged
- Tools and Materials You Will Need
- Step-by-Step Side Mirror Glass Replacement
- How Much Does Side Mirror Glass Replacement Cost?
- Choosing the Right Replacement Mirror Glass
- Common Mistakes to Avoid During Mirror Glass Replacement
- Expert Tips for a Flawless Mirror Glass Replacement
- When to Seek Professional Help
- Maintaining Your New Side Mirror Glass
- Final Thoughts
Why Side Mirror Glass Gets Damaged
Side mirrors take a beating every day on the road. Understanding why they break can help you prevent future damage and know when it is time for a replacement.
Common Causes of Mirror Glass Damage
- Road debris: Small stones and gravel kicked up by other vehicles can chip or crack your mirror glass quickly.
- Weather damage: Hail storms, extreme heat, and sudden temperature changes can weaken and shatter mirror lenses over time.
- Accidents and bumps: Even a minor fender bender or hitting a curb can crack the side mirror glass beyond repair.
- Vandalism: Broken glass on parked cars is unfortunately common in many areas.
- Wear and tear: Over years of use, the adhesive holding the glass weakens, causing cracks and loose fits.
Some drivers wonder whether they should replace the entire mirror assembly or just the glass. In most cases, replacing only the glass is the smarter choice. It costs less and takes far less effort. You can also check out our guide on 30 Unwanted Things You Can Remove From Car Glass for more tips on keeping your car glass in top shape.
Tools and Materials You Will Need
Before you start, gather everything you need. Having all your tools ready saves time and keeps you from scrambling mid-job.
Essential Tools for Mirror Glass Replacement
- Replacement mirror glass: Make sure it matches your car make, model, and year.
- Adhesive or mirror repair kit: A strong automotive-grade adhesive is essential for a secure bond.
- Screwdriver set: Both Phillips and flathead screws are commonly used in mirror assemblies.
- Plastic trim removal tools: These prevent scratches when prying off covers and clips.
- Rubbing alcohol or glass cleaner: You need a clean surface for the adhesive to bond properly.
- Soft cloth or microfiber towel: For wiping down surfaces and cleaning the new glass.
- Safety gloves and eyewear: Broken glass can cause serious injuries, so protect yourself.
Most of these items are affordable and easy to find at any auto parts store. If you want to learn more about handling car parts and glass safely, you might also enjoy our article on Can I Do My Own Car Diagnostics for general DIY car care advice.
Optional but Helpful Items
- Masking tape: Useful for holding pieces in place while the adhesive sets.
- Heat gun or hair dryer: Warmth helps activate certain adhesives and soften plastic clips.
- Painter’s tape: Protects surrounding paint from adhesive drips or scratches.
Step-by-Step Side Mirror Glass Replacement
This is the core of our Car Side Mirror Glass Replacement Guide Made Simple. Follow each step carefully for the best results.
Step 1: Remove the Mirror Trim and Cover
Start by gently prying off the plastic trim piece around the mirror. Use your plastic trim removal tool to avoid scratching the paint. Most mirrors have clips that pop out with gentle pressure. Work slowly around the edges until the cover comes free.
Step 2: Disconnect the Electrical Connector
If your mirror has heating or turn signals, you will see an electrical plug behind the assembly. Press the release tab and carefully pull the connector out. Set it aside in a safe place.
Step 3: Remove the Old Mirror Glass
The old glass is usually held in place by clips or adhesive. Gently wiggle the glass to loosen it. If it feels stuck, apply a small amount of heat around the edges to soften the adhesive. Always wear gloves during this step. Place the old glass in a sturdy container immediately to prevent injuries.
Step 4: Clean the Mirror Housing
Use rubbing alcohol and a soft cloth to clean the inside of the mirror housing thoroughly. Remove any old adhesive residue. A clean surface ensures the new glass bonds properly and lasts longer.
Step 5: Apply Adhesive to the New Glass
Apply a thin, even layer of adhesive to the back of the new mirror glass. Follow the instructions on your adhesive product carefully. Less is more here. Too much adhesive can squeeze out and create a messy bond.
Step 6: Install the New Mirror Glass
Press the new glass firmly into the housing. Hold it in place for the recommended time, usually one to two minutes. Use masking tape to secure the glass if needed while the adhesive cures. Let the adhesive set for at least 24 hours before driving.
Step 7: Reconnect the Electrical and Test
Once the adhesive has set, reconnect the electrical plug. Reattach the trim cover by pressing it back into place. Test the mirror by adjusting it and checking any heated or signal features.
How Much Does Side Mirror Glass Replacement Cost?
One of the biggest reasons drivers avoid fixing a cracked mirror is cost. The good news is that replacing side mirror glass is one of the most affordable car repairs you can do.
Here is a quick cost breakdown to give you a realistic picture:
- Replacement mirror glass: $10 to $50 depending on your car model and where you buy it.
- Adhesive or repair kit: $5 to $15 for a quality product.
- Professional installation: $75 to $200 at a repair shop or dealership.
- Total DIY cost: Usually under $65, saving you a significant amount.
Doing it yourself is clearly the budget-friendly choice. The only cost you really need to cover is the glass and adhesive. If you are curious about other car maintenance costs, you can read our piece on Can I Put Too Much Weight In My Car for more insight into keeping your vehicle in good shape without overspending.
Choosing the Right Replacement Mirror Glass
Not all mirror glass is the same. Picking the wrong piece can lead to a poor fit, poor visibility, and wasted money.
OEM vs Aftermarket Mirror Glass
OEM (Original Equipment Manufacturer) glass is made by the same company that supplied your car. It matches perfectly in size, shape, and clarity. Aftermarket glass is made by third-party manufacturers and is usually more affordable. Both options work well, but OEM glass tends to offer a closer factory match.
How to Find the Right Fit
- Check your vehicle owner’s manual for the exact mirror specifications.
- Look up your car make, model, and year online to find compatible glass.
- Measure the old glass carefully if you are ordering online.
- Check for compatibility with heated mirrors, turn signals, or auto-dimming features.
Taking a few extra minutes to verify the fit before ordering saves frustration later. Many online auto parts retailers have fitment guides that make this process easy.
Common Mistakes to Avoid During Mirror Glass Replacement
Even simple jobs can go wrong if you skip steps or rush through the process. Here are the most common mistakes drivers make when replacing side mirror glass.
- Using the wrong adhesive: Not all adhesives work on car glass. Always use an automotive-grade product designed for exterior glass bonds.
- Skipping surface preparation: A dirty or greasy surface weakens the adhesive bond significantly. Always clean the housing thoroughly.
- Handling the new glass with bare hands: Oils from your skin can interfere with the adhesive. Wear gloves throughout the process.
- Driving too soon: Rushing to drive before the adhesive fully cures can cause the glass to shift or fall out.
- Forcing the glass into place: If the glass does not fit, do not force it. Check for alignment issues and try again gently.
- Ignoring weather conditions: Installing mirror glass in cold or humid conditions weakens the bond. Choose a warm, dry day for the best results.
Avoiding these mistakes will help your replacement mirror glass last for years. If you want to protect your car glass even further, consider applying 3M Anti Glare Film For Car Windshield to reduce glare and improve visibility on the road.
Expert Tips for a Flawless Mirror Glass Replacement
Here are some pro tips that make the job even easier and more reliable.
- Work in a shaded area: Direct sunlight can cause adhesive to dry too fast, reducing bond strength.
- Use a heat gun on low: Gently warming the mirror housing makes old adhesive easier to remove and new adhesive more flexible.
- Take photos before disassembly: Photos help you remember how everything connects, especially the electrical wiring.
- Keep a flashlight handy: Good lighting helps you see small clips and connectors that are easy to miss.
- Test the fit before applying adhesive: Hold the new glass in place without adhesive first to confirm it fits properly.
- Be patient with the adhesive cure time: Most automotive adhesives need 24 hours for a full bond. Resist the urge to drive immediately.
These small extra steps make a big difference in the longevity and quality of your replacement. Taking your time pays off in the long run.
When to Seek Professional Help
Replacing side mirror glass is a great DIY project for most drivers. However, there are situations where professional help makes sense.
- Electric mirror adjustments are broken: If the motor or adjustment mechanism is damaged, a professional can handle the electrical repair.
- The entire mirror housing is cracked: Replacing just the glass will not help if the housing itself is damaged.
- You are uncomfortable working with glass: Safety should always come first. If you feel unsure, a professional can do the job safely.
- Your car has advanced mirror features: Blind spot monitoring, auto-dimming, or camera-integrated mirrors may require specialized knowledge.
There is no shame in asking for help when you need it. A professional mechanic can often complete the job in minutes and ensure everything works perfectly.
Maintaining Your New Side Mirror Glass
Once your new mirror glass is installed, a little maintenance goes a long way in keeping it clear and secure.
- Clean gently: Use a soft cloth and mild glass cleaner. Avoid harsh chemicals that can weaken the adhesive bond over time.
- Inspect regularly: Check your mirror glass every few weeks for cracks, chips, or loosening.
- Clear ice carefully: Use an ice scraper gently. Never chip ice off the mirror with sharp objects.
- Address small cracks immediately: A small chip can spread quickly with vibration and temperature changes. Fix it before it becomes a full replacement job.
Regular maintenance keeps your side mirror glass looking clear and functioning properly for years to come. It is one of those small habits that saves you time and money down the road.
Final Thoughts
Replacing your car side mirror glass does not have to be a stressful experience. With the right tools, the correct replacement glass, and a little patience, you can handle this repair yourself in under an hour. This Car Side Mirror Glass Replacement Guide Made Simple covers everything from preparation to installation, so you feel confident from start to finish.
Remember to prioritize safety at every step. Wear gloves, work in good lighting, and give the adhesive enough time to cure fully. The money you save by doing it yourself is just one of the rewards. The real benefit is knowing you can take care of your car without depending on a shop for every repair.
Keep this guide bookmarked for future reference. Share it with a friend who might need a hand. And most importantly, get back on the road with a clear view and a mirror you can trust.
Frequently Asked Questions
How long does it take to replace a side mirror glass?
Most drivers can complete the replacement in 30 to 60 minutes. The exact time depends on your car model and your experience level. If it is your first time, give yourself an extra 15 minutes to work through the steps carefully.
Can I replace side mirror glass without replacing the whole mirror?
Yes, in most cases you only need to replace the glass itself. The mirror housing and electrical components usually remain intact. Replacing just the glass is much cheaper and faster than replacing the entire assembly.
What adhesive should I use for mirror glass replacement?
Use an automotive-grade adhesive specifically designed for exterior glass bonds. Products like epoxy-based mirror adhesives or specialized repair kits work best. Avoid using super glue or household adhesives, as they do not hold up under weather and vibration conditions.
Is it safe to drive with a cracked side mirror glass?
Driving with a cracked mirror is not recommended. It limits your visibility and can worsen the crack from road vibration and wind. In many areas, driving with a damaged mirror may also violate traffic laws. Replace the glass as soon as possible for safety and compliance.
How much does a replacement side mirror glass cost?
A replacement side mirror glass typically costs between $10 and $50. Aftermarket options are usually on the lower end, while OEM glass may cost a bit more. The total DIY cost including adhesive is generally under $65, which is far less than professional installation.
Can I replace the mirror glass in cold weather?
It is best to replace mirror glass in warm, dry conditions. Cold weather can prevent adhesive from curing properly and weaken the bond. If you must replace the glass in cold weather, use a garage or heated space and choose an adhesive rated for low temperatures.
=== CONCLUSION ===
The Car Side Mirror Glass Replacement Guide Made Simple shows you that this repair is well within reach for any driver. You do not need expensive tools, advanced skills, or hours of free time. With a replacement glass, some adhesive, and the steps outlined in this guide, you can restore your side mirror to full working condition quickly and affordably.
Take your time, follow each step carefully, and prioritize safety throughout the process. Your car glass keeps you connected to the road around you, and a properly functioning side mirror is a small but vital part of that connection. Apply what you have learned here, and enjoy the confidence of handling your own car maintenance with ease.